Settings
The settings tab allows you to manage your local settings, global settings, profile setting, notification settings, badge, agreements, mailing, mailing groups, auto emails and custom fields.
Local Settings
There is an option of creating a number of local settings pages by clicking on the "Create New" button and applied them to the certian locations in the Locations tab while creating or updating the Location and selecting Settings Profile option in the form.
Alerts
This tab gives you the possibility to set the availability to search from devices.
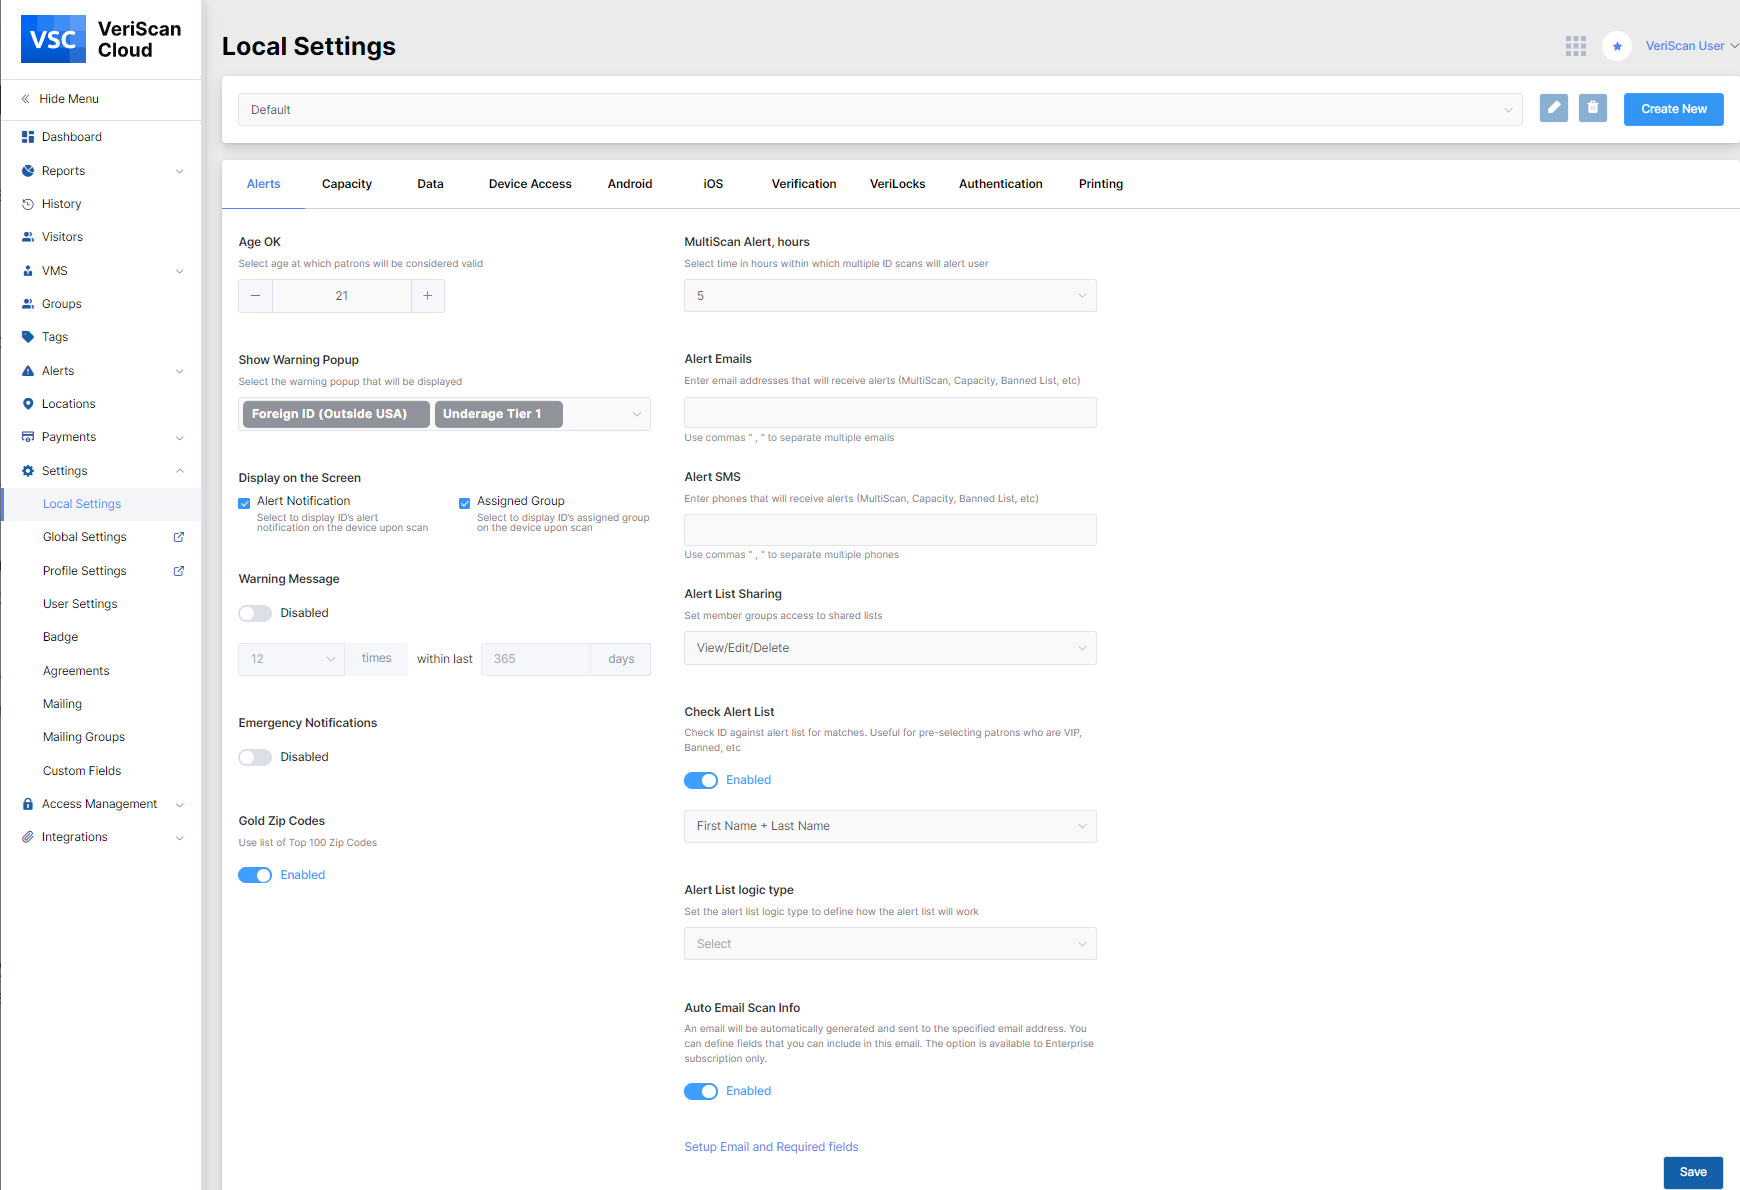
Age OK is the option if a minimum age requirement is needed, select the age that is required to enter your premises. You will be able to see the warning popups if you choose the ones in the Show Warning Popup option.
The Multiscan Alert notifies the host if a visitor has scanned in multiple times within a certain time frame. For example, if you select 3, if a visitor scans in more than once within a 3 hour time period, you will receive an alert. If you do not want to increase the counter if a single person scans in multiple times, you can check the corresponding box to keep your visitor total based on unique visitors.
By checking Check Alert List box, you enable the software to check the scanned ID against the alert list for matches. This is particularly useful in determining whether there are any banned visitors or VIP guests. Warning Messages. You can enable a display of a warning message at a set time period.
Alert emails - Type in the emails of who you would like to receive alerts when a particular group member scans in.
Alert SMS - Enter the phone numbers of the people you would like to receive alerts for, i.e. Banned.
Alert List Sharing is the option when you share your alert lists and determine what other members(VS Online accounts) can do with them using the options listed in the down down.
Display on the Screen - You can determine whether you would like an alert notification or assigned group to appear on the device where the ID is scanned. To set the emergency notifications or gold zip codes you should enable these options.
Warning Message alert can be enabled and set for the specific time period when the alert is shown.
The user has an option to enable/disable the Emergency Notifications as well as set the alert list logic type to define how the alert list will work.
When enabling an Auto Email Scan Info option an email will be automatically generated and sent to the specified email address. You can define fields that you can include in this email. The option is available to Enterprise subscription only.
Capacity
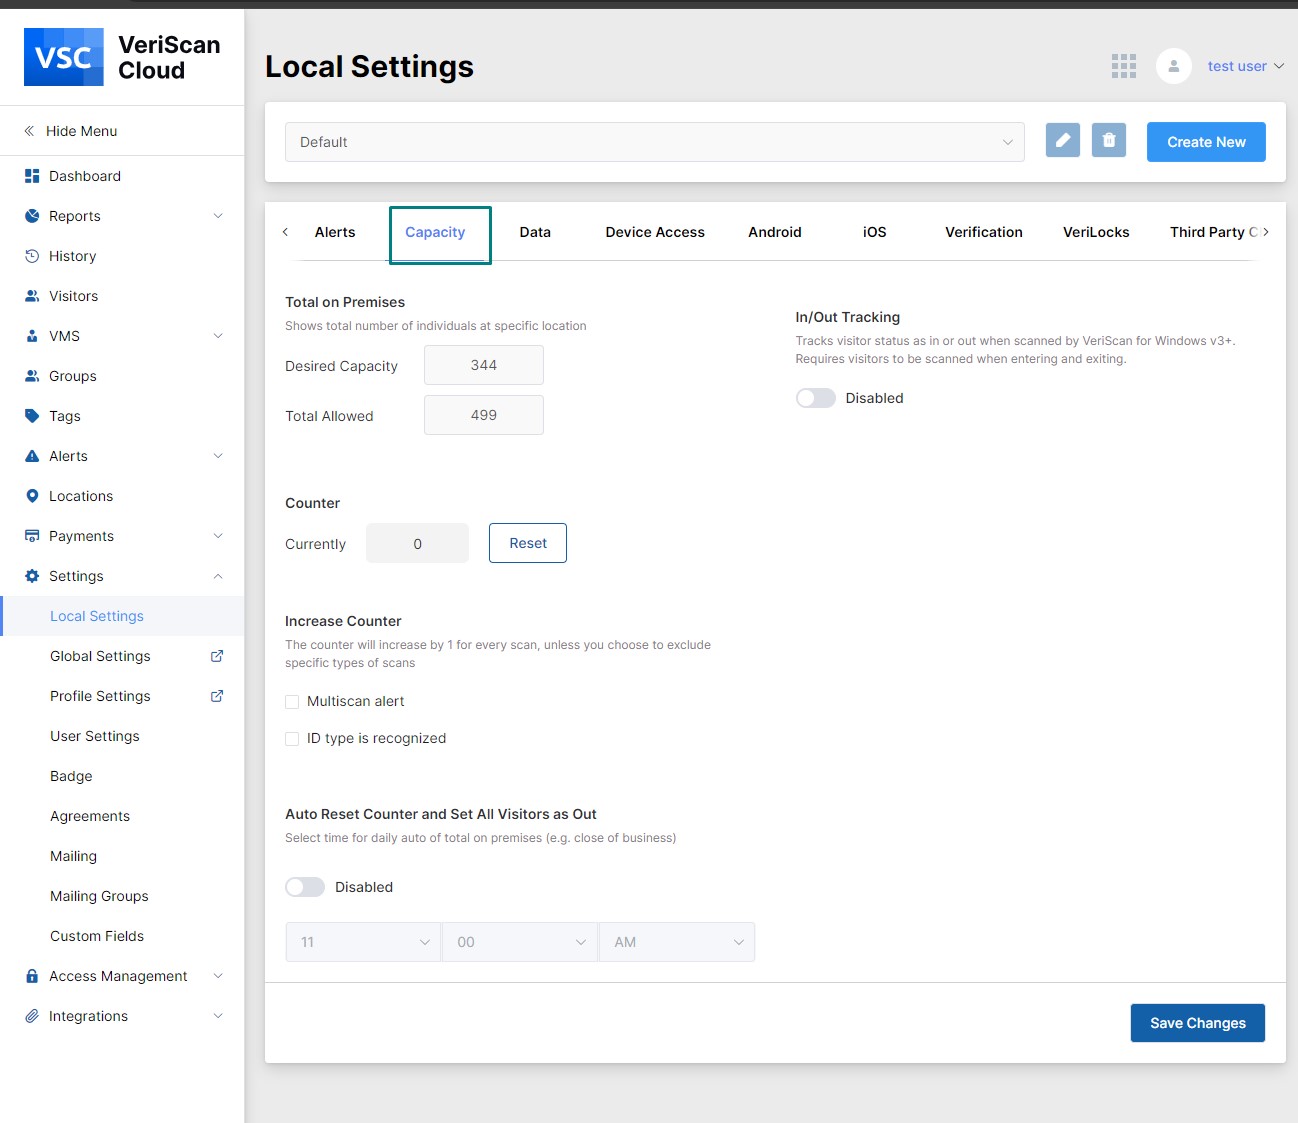
This section provides options to increase/ decrease the number of individuals on premises as well as enable an auto reset counter by checking the box and entering the desired time you would like the counter to be reset. By default, the counter will reset every 24 hours. When enabled, the In/Out Tracking option tracks visitor status as in or out when scanned by VeriScan for Windows v3+. Requires visitors to be scanned when entering and exiting. Provided In/Out is enabled, all currently IN visitors are marked as OUT to start with the outset. Users can choose to decrease the counter when a visitor is set as out.

Data section allows you to enable the encryption of the ID number when scanning the document. Data Collection provides an option to select whether you want to collect and store different data from the visitor’s ID. Data Retention options gives the possibility to select the time for how long and what data will be stored.
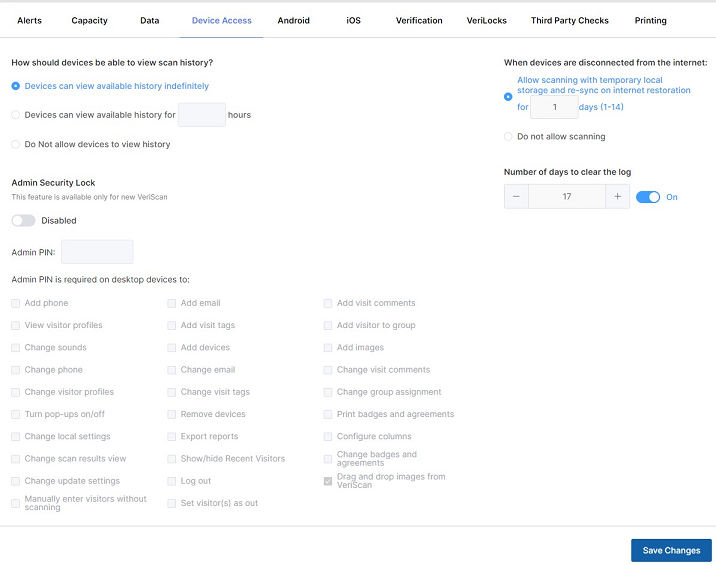
Device Access section allows you to select the number of hours you want the history to remain on the local devices. You may choose the option to scan the documents when the Internet connection is lost and enable/ disable Admin/Security Lock on desktop devices. It is possible to set the number of days the logs will be cleared after.
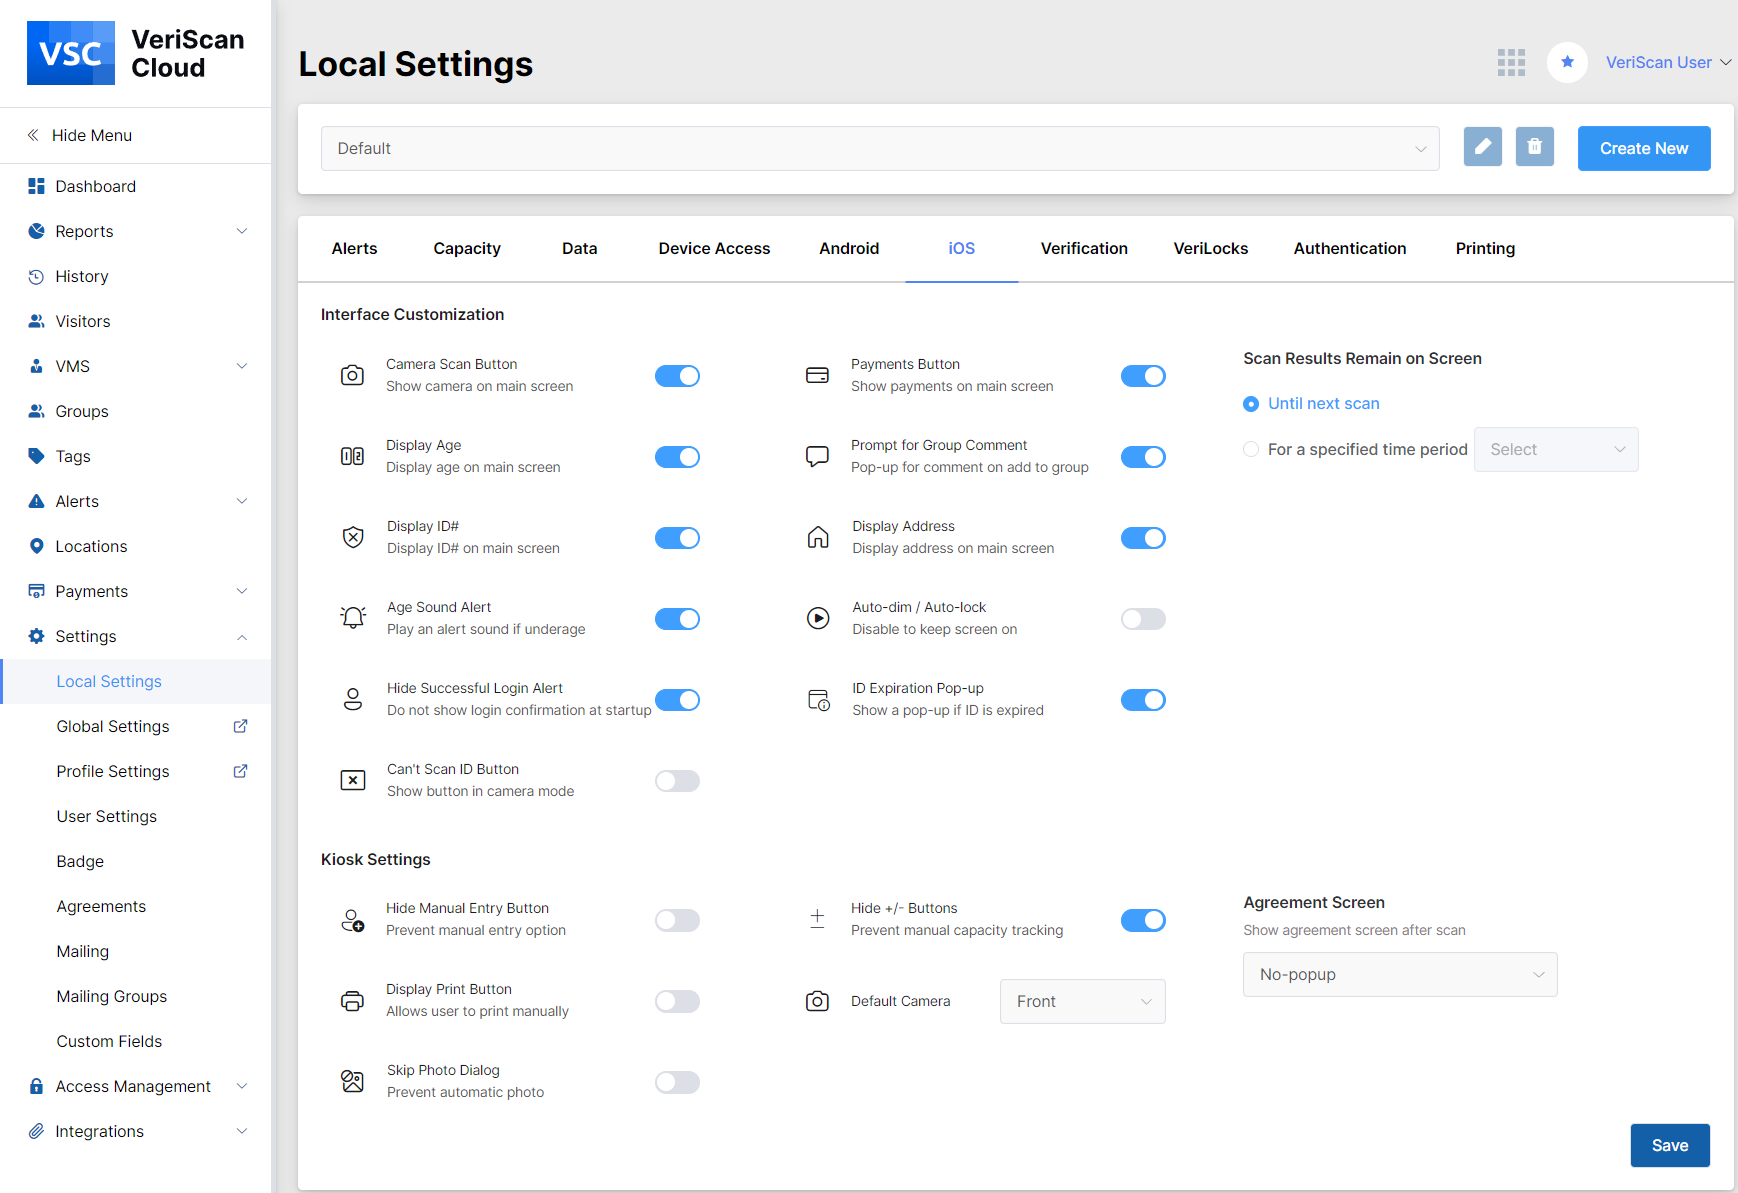
Android and iOS sections provide an opportunity to customize the settings on the devices.
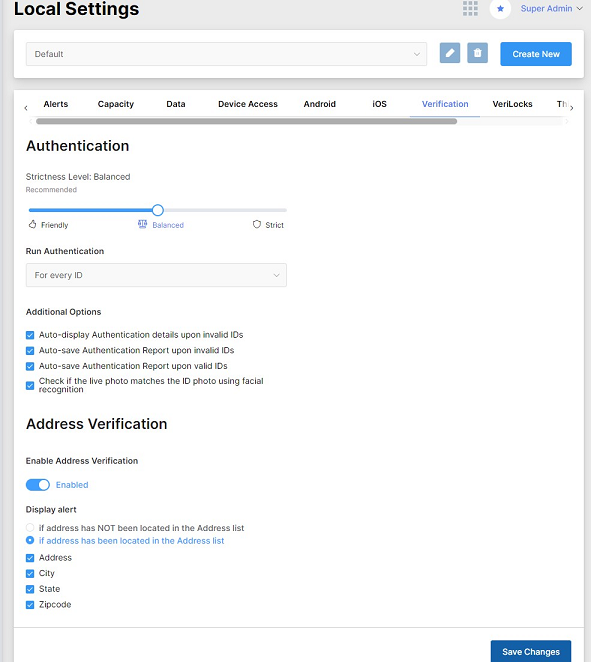
Verification section shows an option to enable/disable address verification. You may select the option of displaying alert if address has/has not been located in the Address list. You may also enable/disable the option to run Authentication tests with additional options and select the strictness level for authentication.
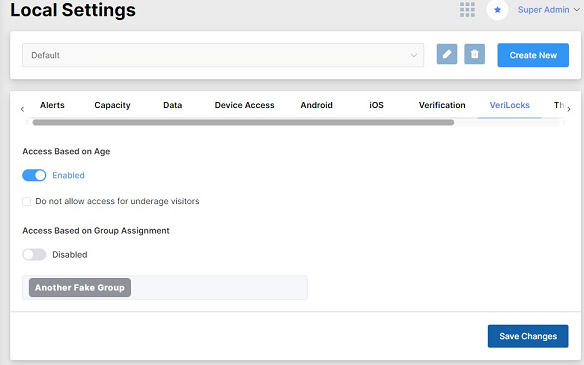
VeriLocks section gives the possibility to enable/disable access of the visitors either based on age or based on group assignment.
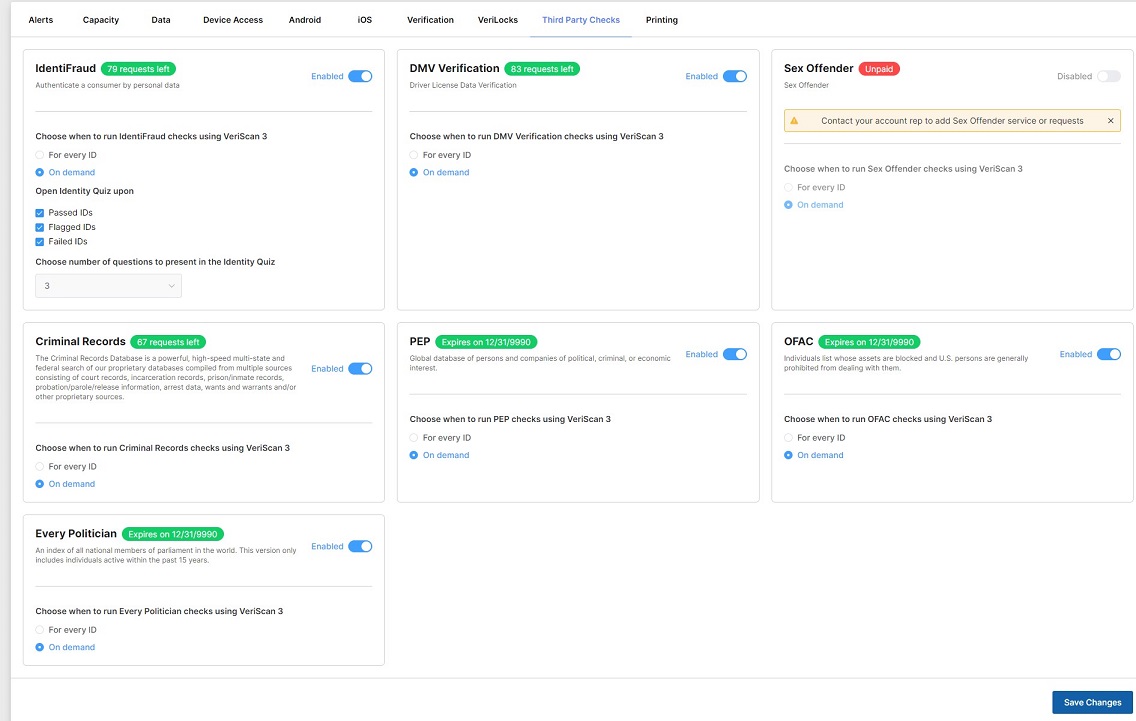
Third Party Checks allows you to confirm that the person you are dealing with is not involved in any fraud, criminal or other illegal activity. In accordance with the purchase of the third party checks packages the user has an option to enable/disable the screening services separately. The user has an option to run tests On demand or For every ID by clicking on the corresponding radio button. In addition the tab provides information on the status of the package for every service (expiration date due, paid/unpaid, the number of requests left for the service). The status for the tests performed (Failed/Passed/Skipped/Flagged) as well as the Show Report link and comments on the issues that happened can be seen in the History section.
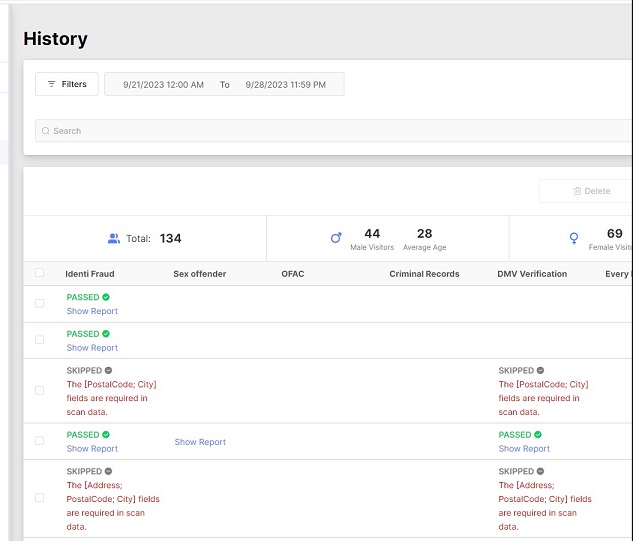
When you click on the Check button in the This Visit popup window the result is rewritten.
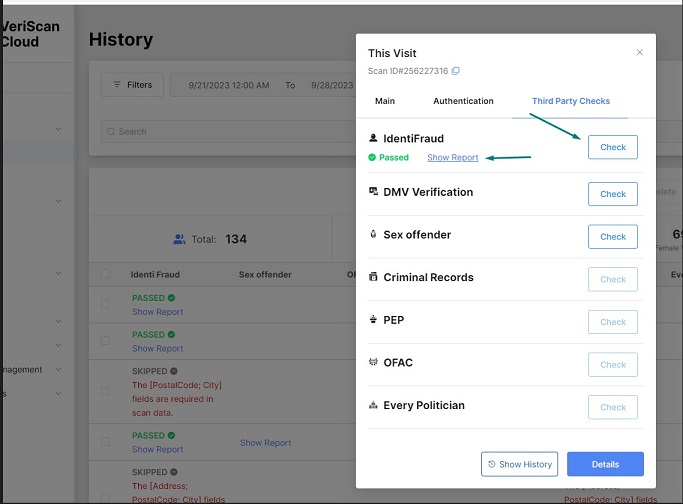
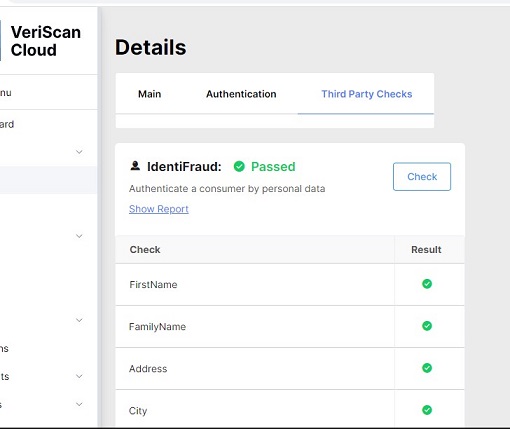
Clicking on the Show Report link you go to the Screening Service portal where the details on the request are shown.
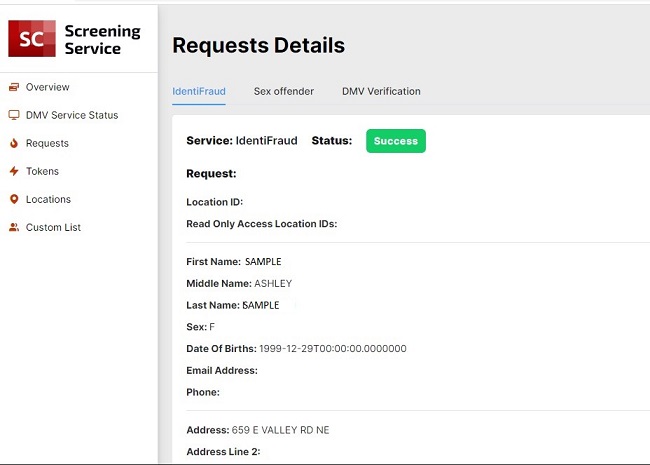
For more information on the Third Party Checks follow: https://docs.idscan.net/screening/index.html
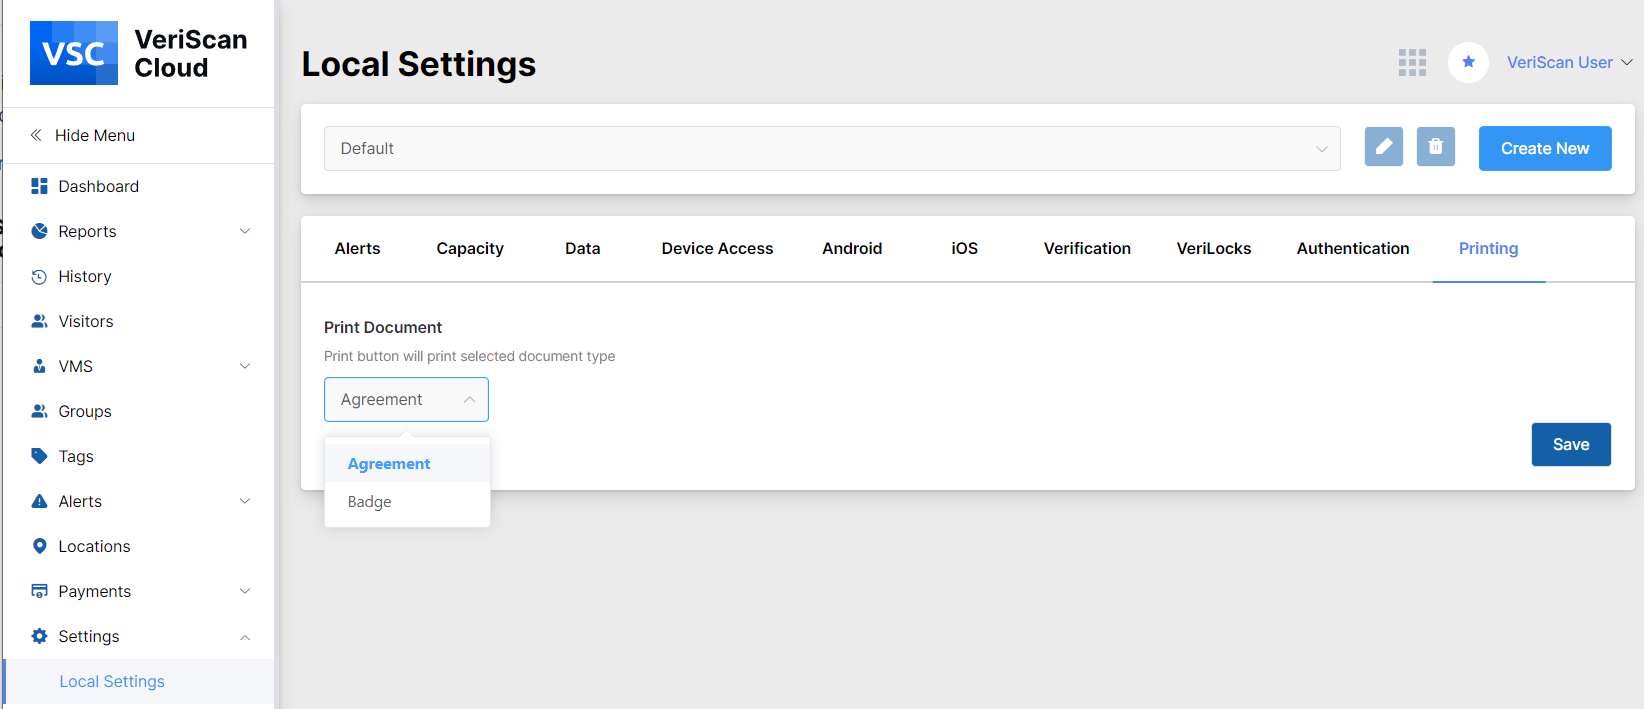
Printing. The option to print either an agreement or a badge is possible when clicking the drop down list in the corresponding field. Do not forget to save all the changes to be applied by clicking on the blue 'Save' button with each section.
Global Settings
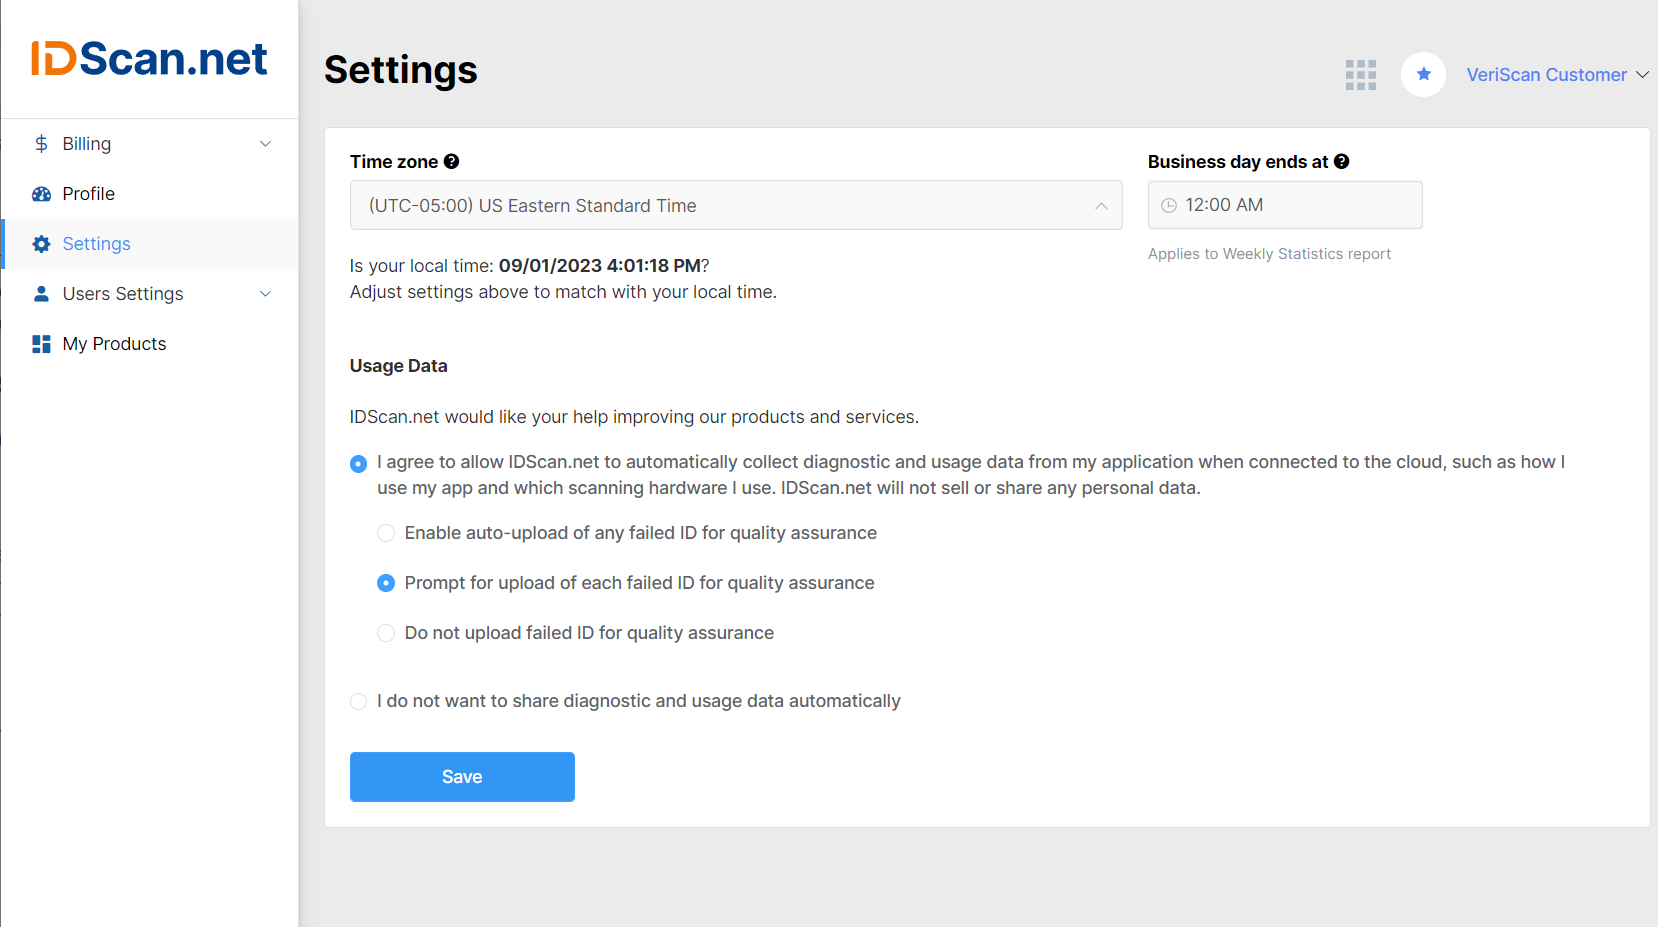
When selecting the Global Settings section on the menu a new page is opened where you are able to select the time zone and a “Business day ends at” option. This option collates the ID scans based on business day rather than the 24 hour day. This is applied to the Weekly Statistics Report. In addition, here you may select to collect diagnostic and usage data or not to share such data.
Profile Settings
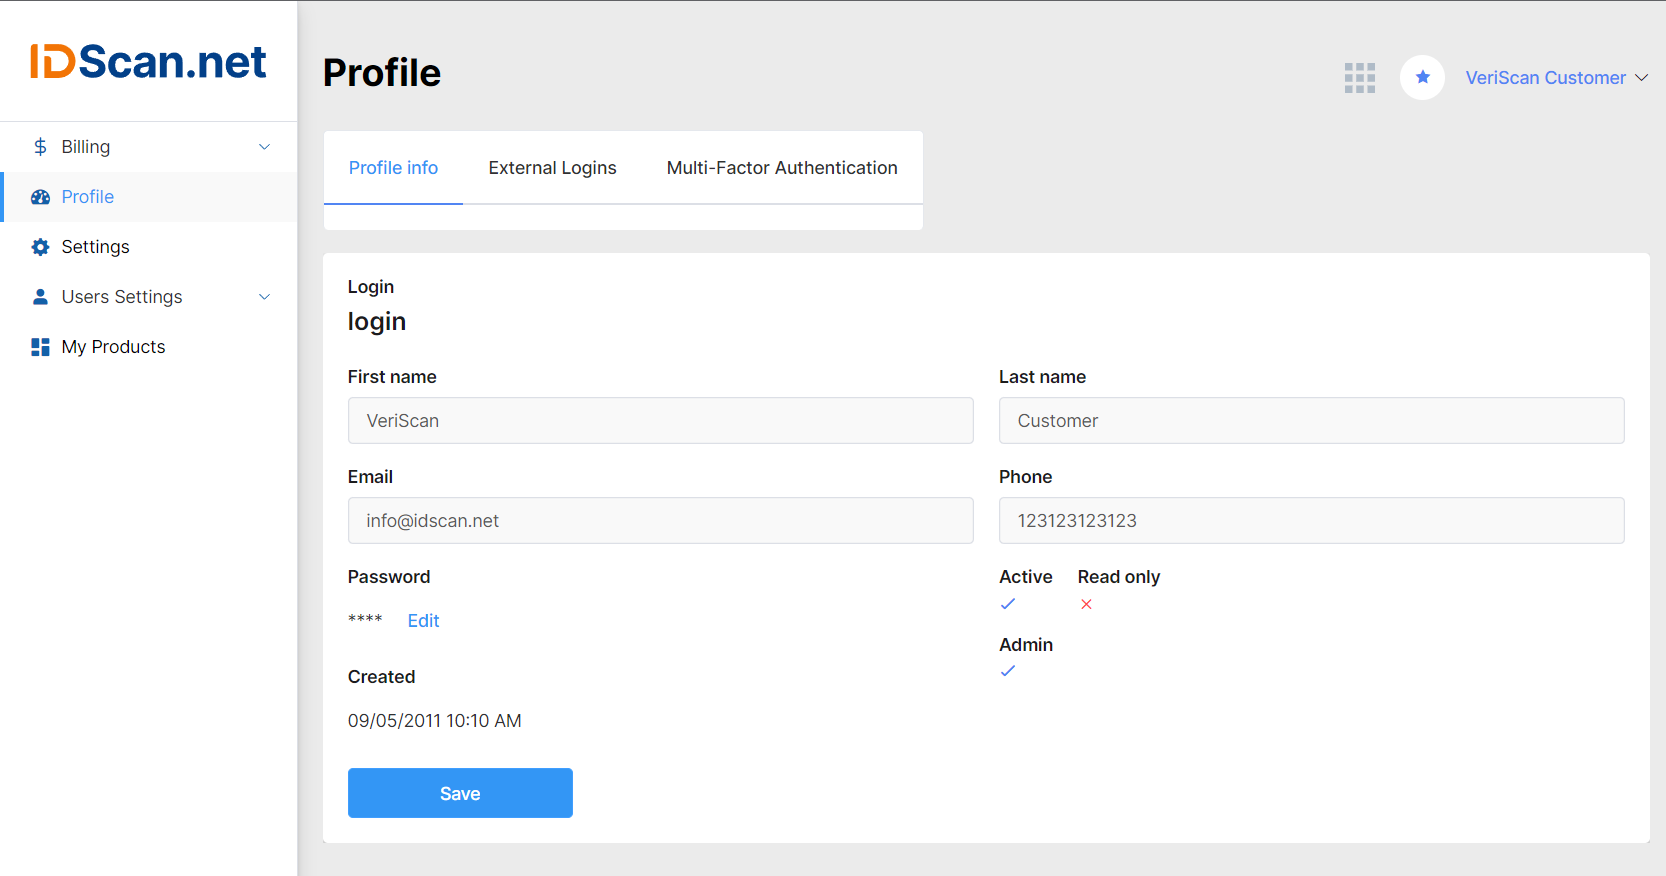
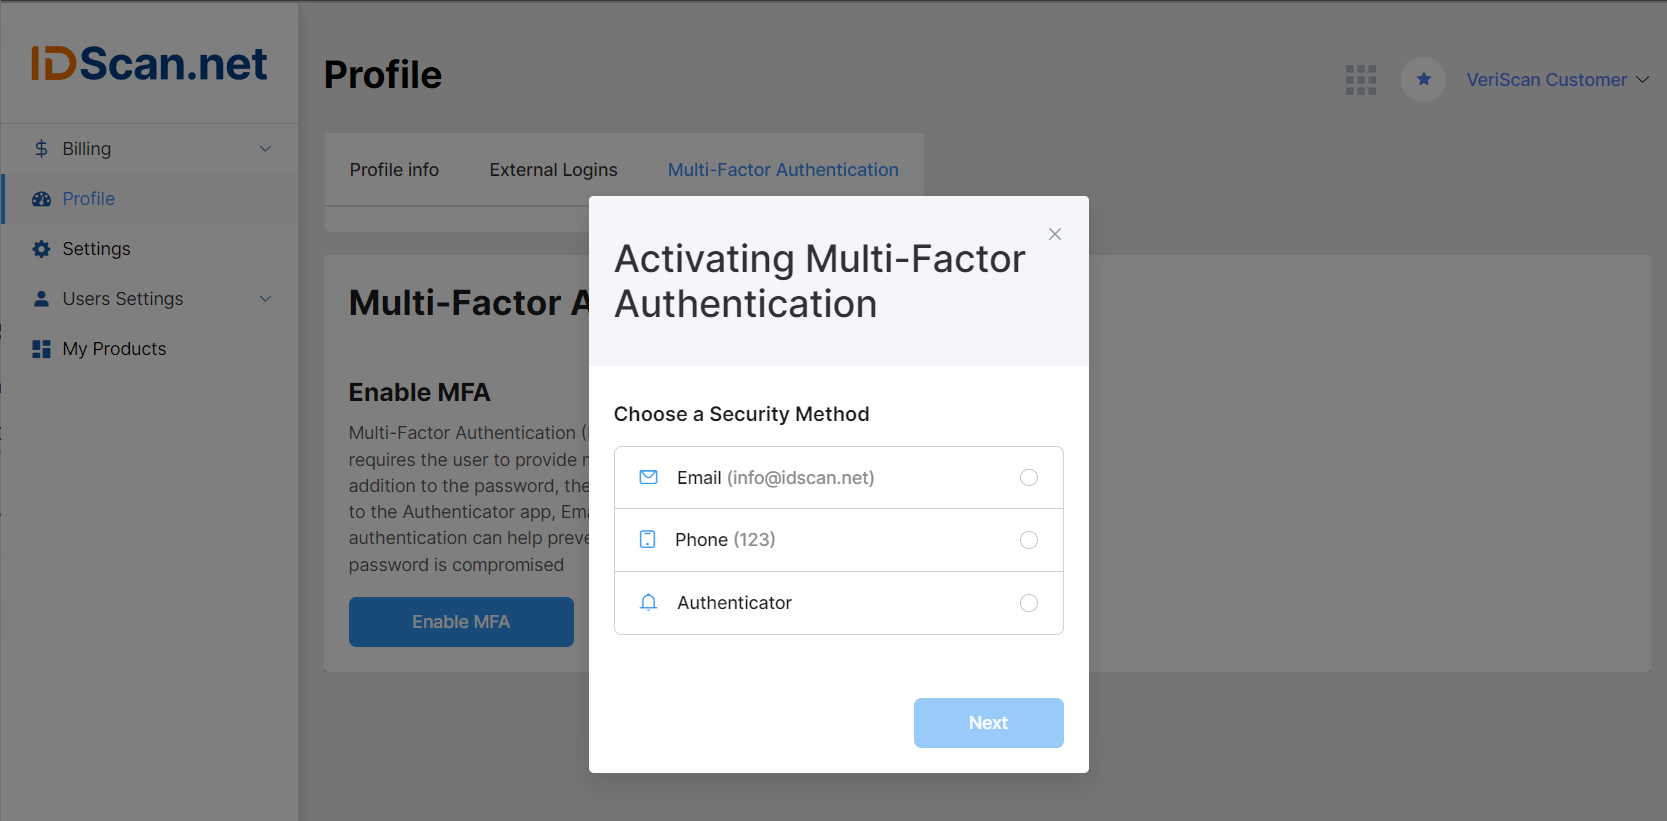
You can edit such user’s information as first name, last name, email, phone as well as have information on external logins and enable MFA as well.
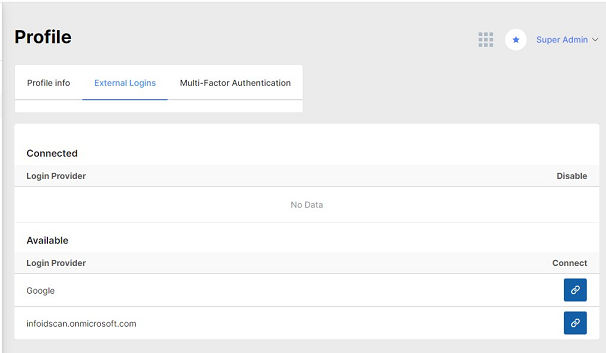
External Logins tab provides information on the login providers to connect with.
Multi-Factor Authentication supports three methods to choose from: email, phone and authenticator app:
User Settings
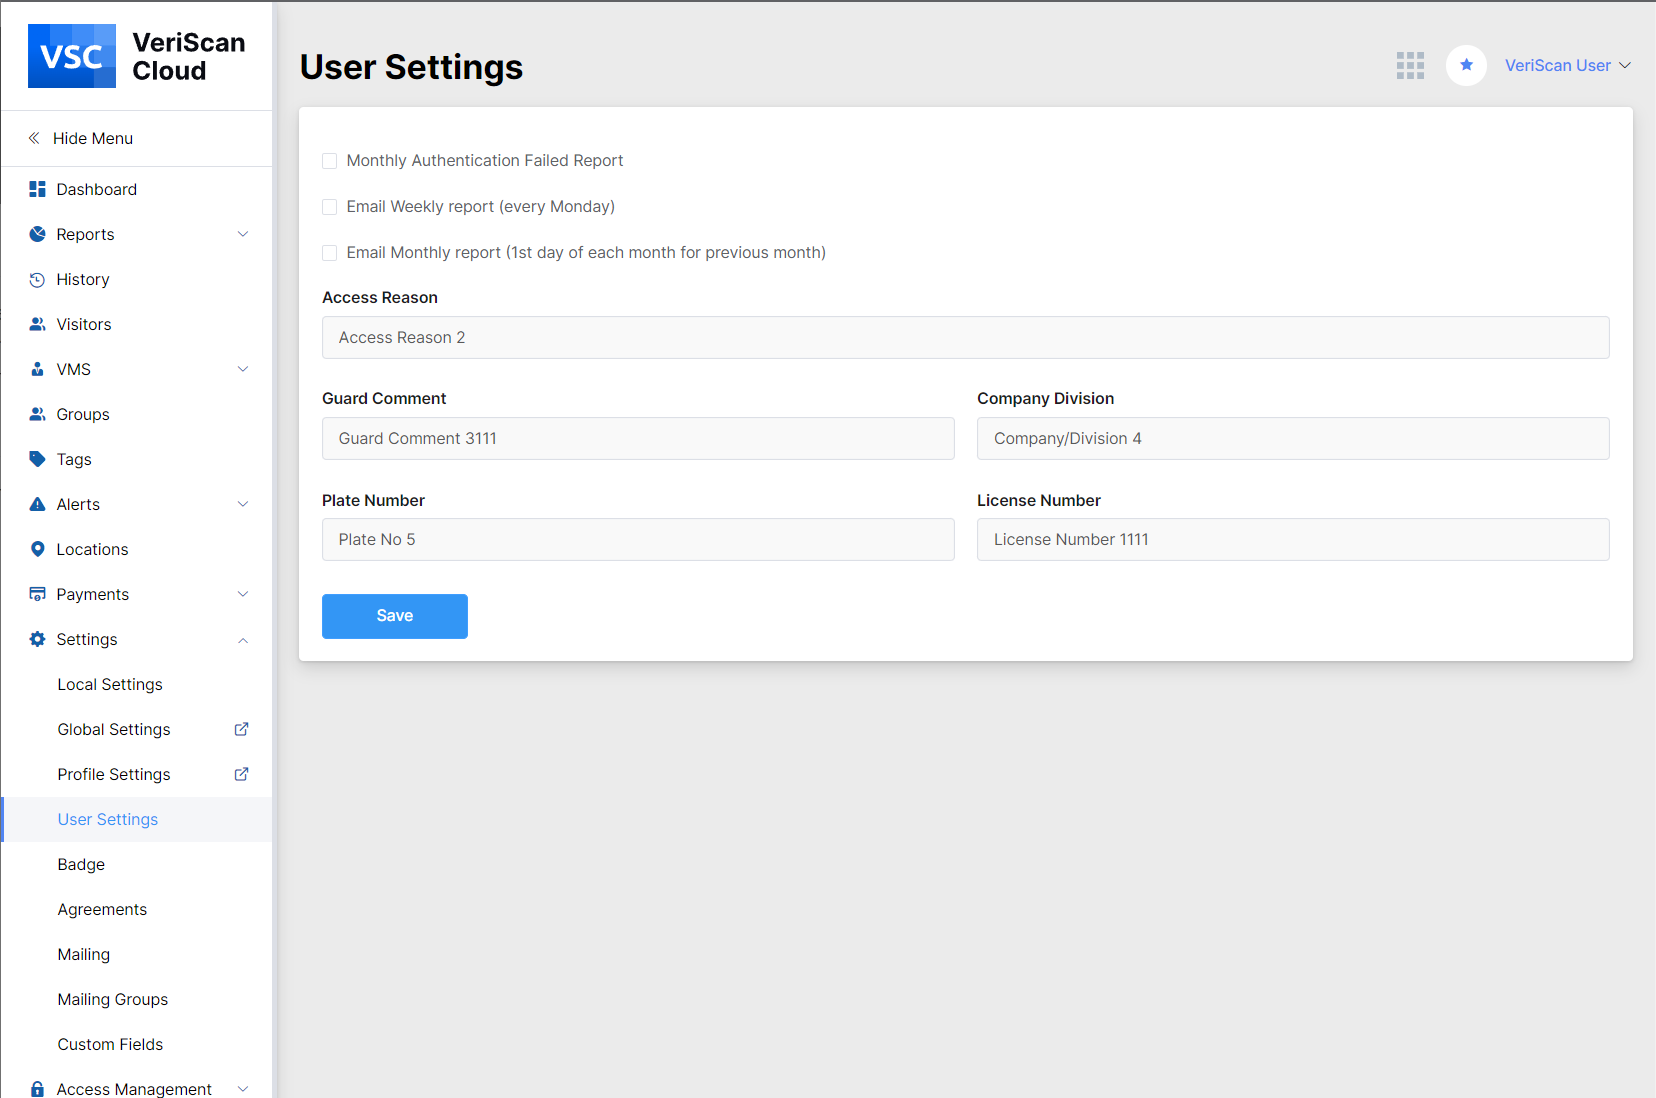
You may select between weekly report email notifications (every Monday), monthly report email notifications (1st day of each month for previous month) and monthly authentication failed reports. It is possible to state the reason for access, leave the guard comment and fill in the Plate Number, License Number and Company Division fields. Do not forget to save the settings by clicking on the “Save” button.
Badge
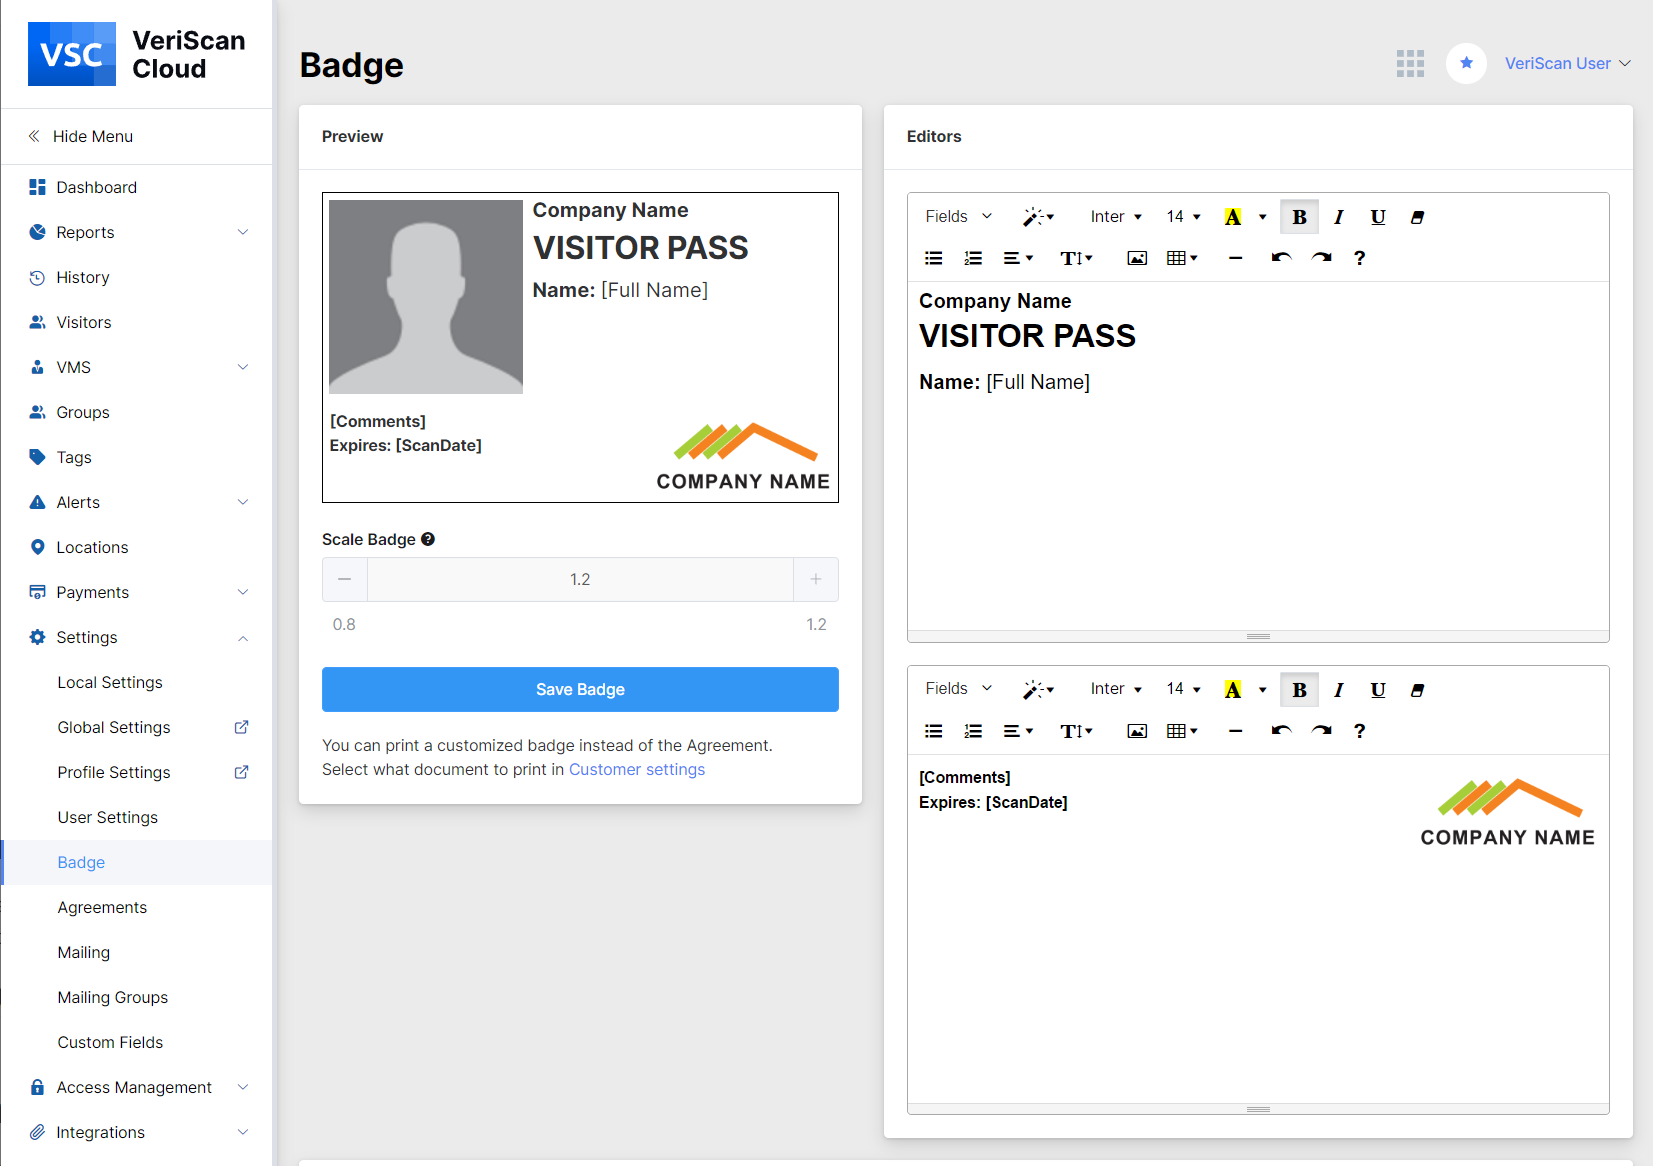
If you choose to have a badge rather than an agreement, here is where you can customize the look of the badge. Contact IDScan.net for badge and mobile printers.
Agreements
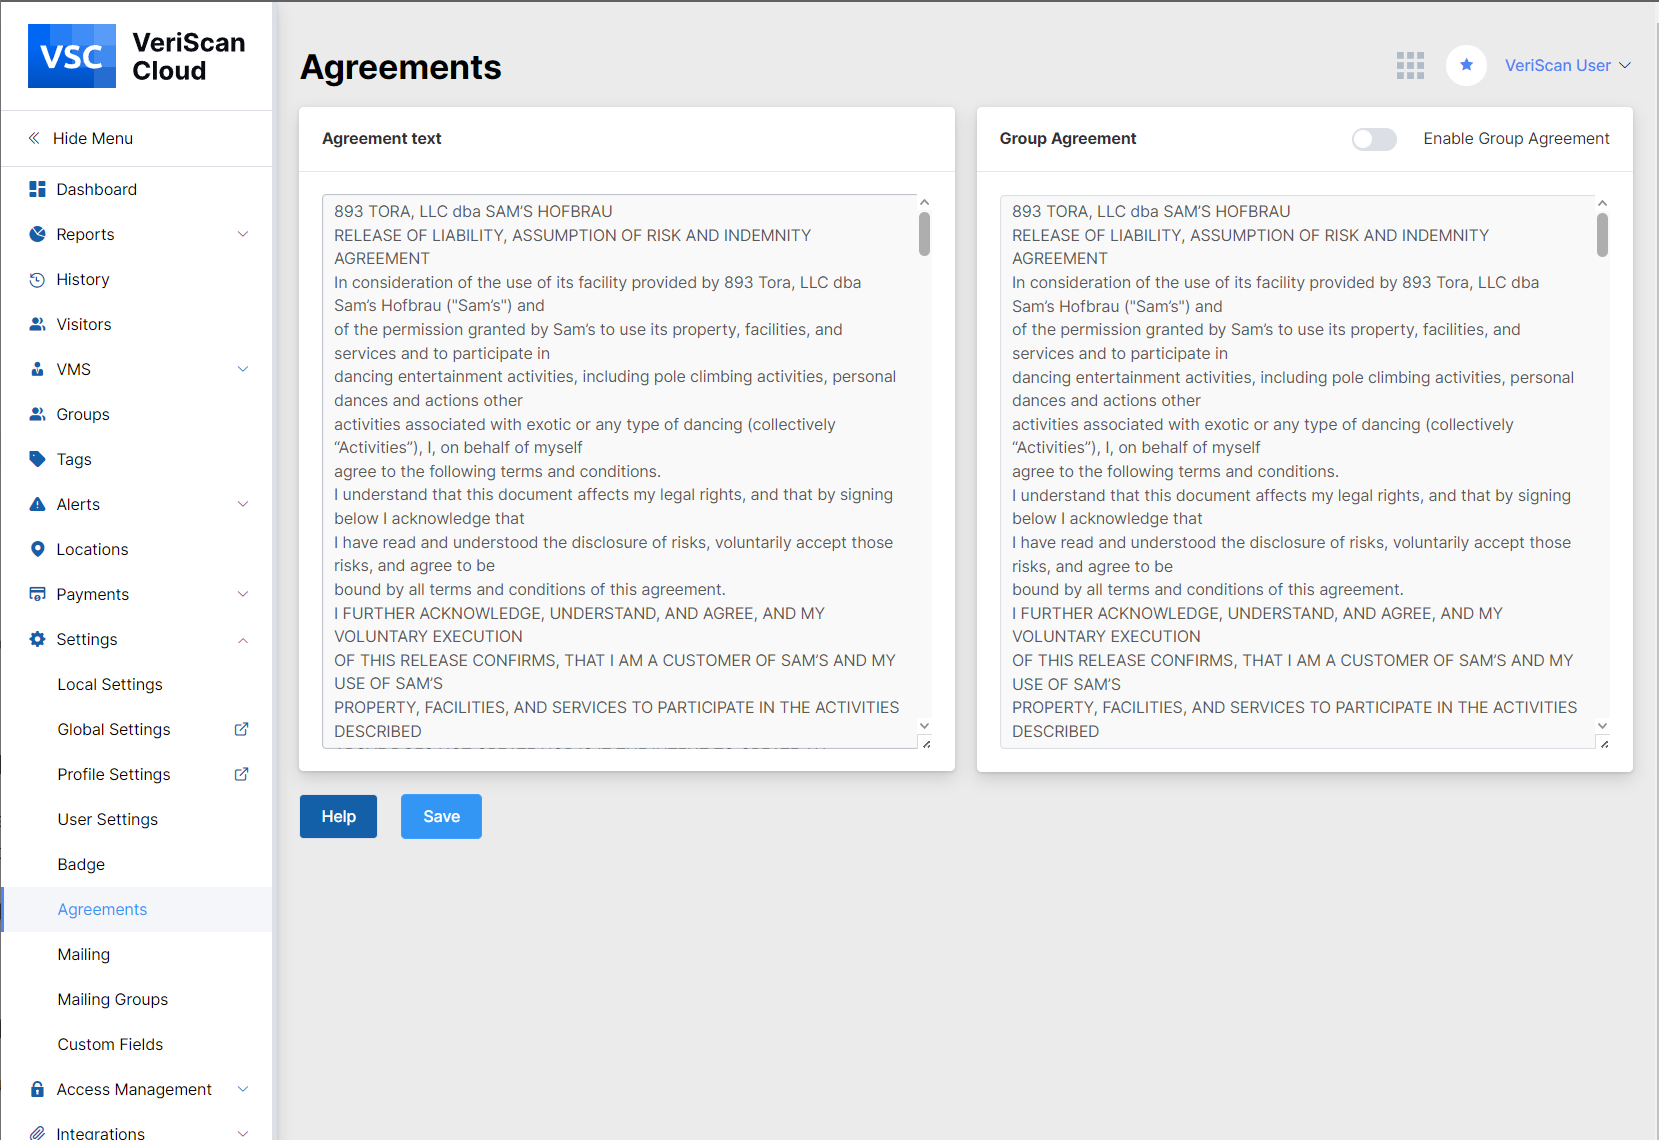
The agreements are where you can create a form you would like visitors to sign at check-in. These agreements are customizable. You can also create group agreements for customers assigned to a group.
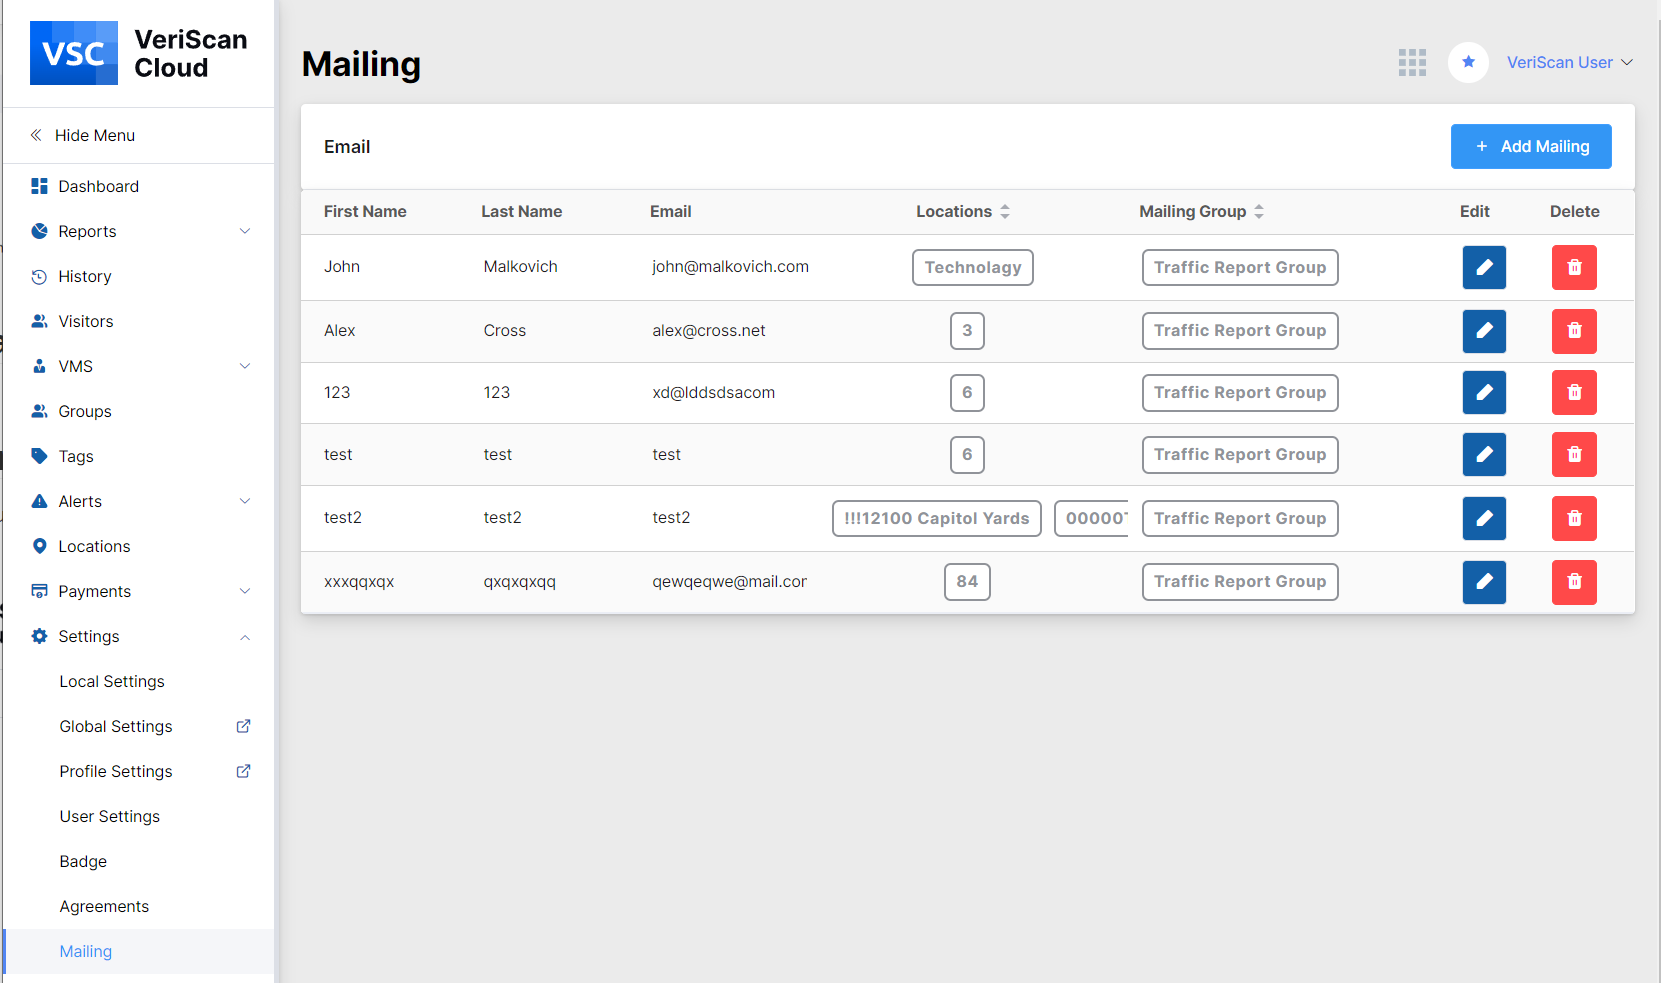
Mailing and Mailing Groups
These tabs provide you with the information that emails are sent for every scan made.
Custom Fields
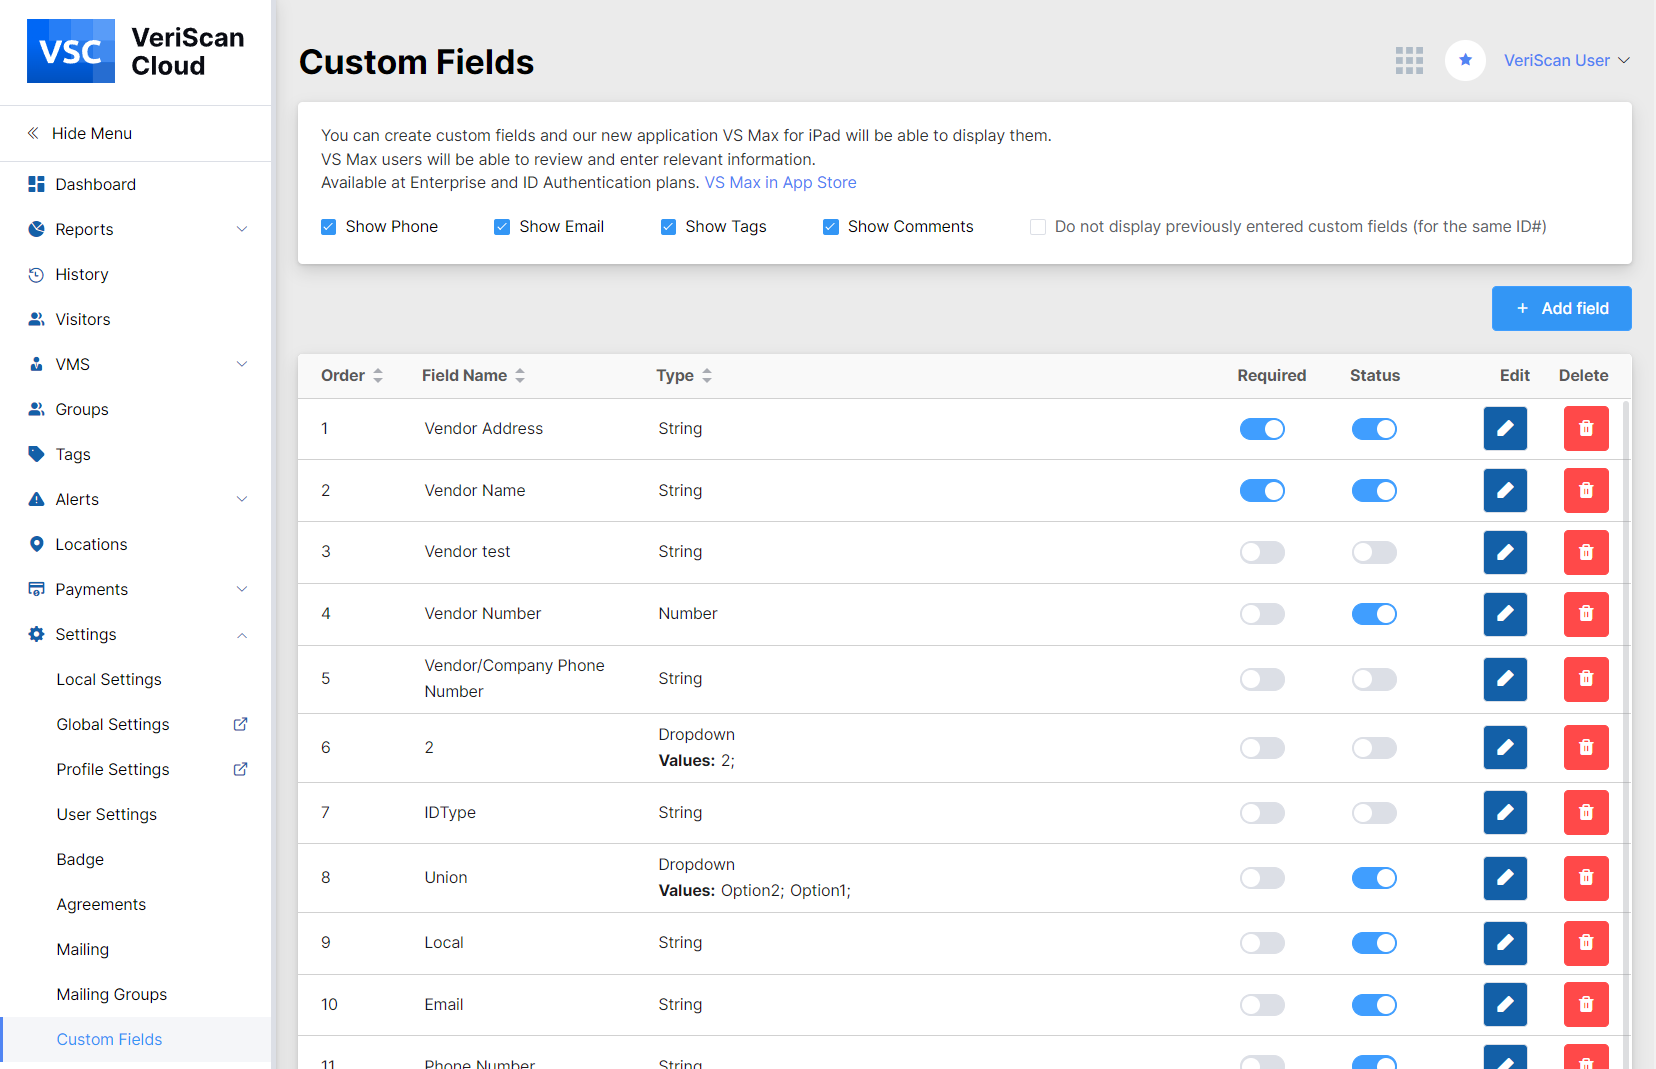
You can create custom fields and our new application VS Max for iPad will be able to display them. VS Max users will be able to review and enter relevant information. This option is available for Enterprise subscribers.
