The General tab


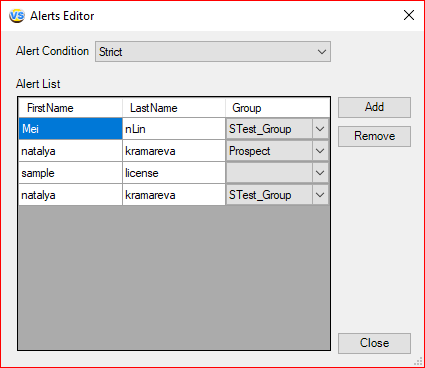
Edit Alerts

Add the first and last name of an individual that has not yet been scanned. Be alerted when the individual is scanned in, and automatically have them assigned to a group, such as VIP or Do Not Admit.
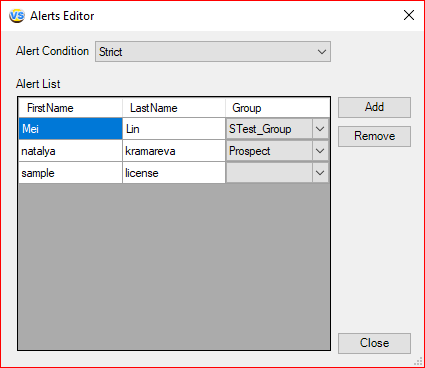
Alert List has a three parameters, according to which the match is searched:
- First Name
- Last Name
- Group (Searching for matches on this parameter does NOT occur! This parameter is purely informative.)
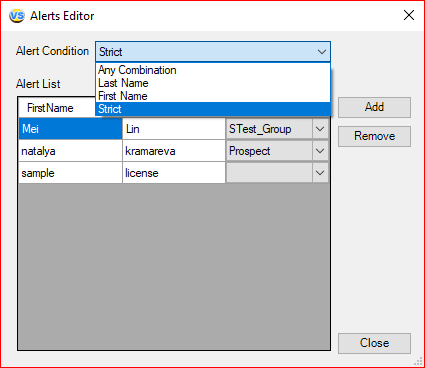
The alert status contains four match settings:
- Any Combination (It works if it matches the Last Name parameter or First Name parameter.)
- Last Name (It works if it matches the Last Name parameter.)
- First Name (It works if it matches the First Name parameter.)
- Strict (It works if there is a simultaneous match of the parameters First Name and Last Name.)
If a match appears in the Last Name or First Name parameters, a window with the following message appears.
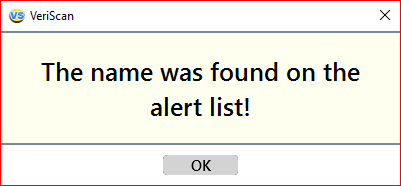
In the column with comments in the profile window and in the history log, corresponding messages will appear.


If there is a match with the specified Group parameter, the name of this group will be indicated in the window.
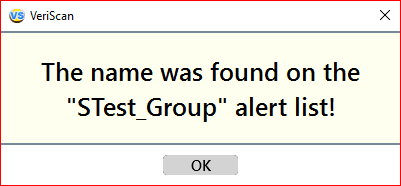
In the column with comments in the profile window and in the history log, corresponding messages will appear.


If there is a simultaneous match of the parameters First Name and Last Name, then the names of all the groups in which the person was represented will be displayed.
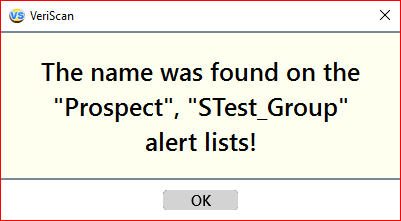
In the column with comments in the profile window and in the history log, corresponding messages will appear.


Manage Visit Types

If your establishment tracks customers by purpose of visit, you may create an unlimited number of them.
Visit Types are located in General => Manage Visit Types. These Visit Types will be available upon each scan.
When using one of our cloud services, Visit Types are the same as Tags. Your Tags from the VeriScan Online portal will be downloaded and available on your desktop application.
To create a new visit type, open the Visit Type Manager. Set coursor in the New Visit Type field. Enter the name of your new visit type and press Add button.
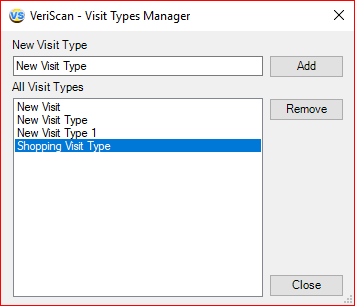
New created visit type will be showed in All Visit Types field. For deleting any visit type select it in All Visit Types field and press Remove button.
To add a visit type, you need to finish scanning the document. In the end of Visit Type field click to the check mark.

Select the types you require and press OK button.
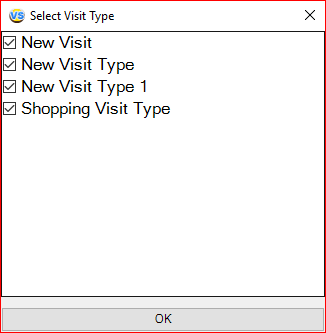
The selected types will be showed in the same field.

Also the selected types will be showed in the History Log.

Manage Groups
Using the Groups feature, the user may create groups such as “Banned” or “VIP” to alert employees when specific types of visitors attempt to enter the premises.
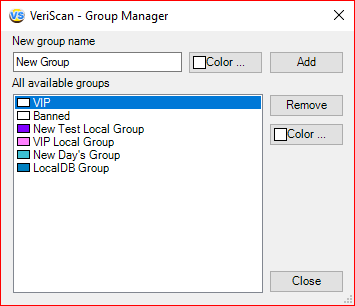
Something to note is that an ID may only be assigned to one group at a time, where as multiple Visit Types or Tags can be assigned.
A color of your choice can be assigned to each Group. This color coding helps to easier identify customers during ID scanning.

Your Groups will also be downloaded from the VeriScan Online portal when using one of our cloud services.
View/Export Log

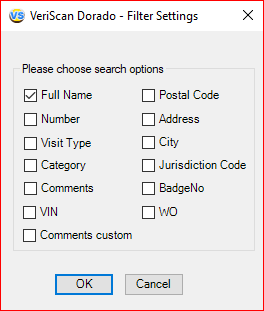
The program lets you save ID information to a log file. To view/export data, go to General→View/Export Log. The file is saved in the following formats: Text, Unicode Text, HTML or CSV (CommaDelimitedFile). You can open a CSV file with practically any program intended to work with data (for example, MS Excel, MS Access, Lotus Office, etc.). You can also import this file into any modern database. You can enable or disable log creation (menu Options > Write to Log).
The log-file can save the following fields: Date/Time of ID scan, Full Name, Age, Gender, ID Number, City, State, Zip, Address, Date of Birth and Comments.
The log can be exported for all dates available or a certain period (such as a day or a week).
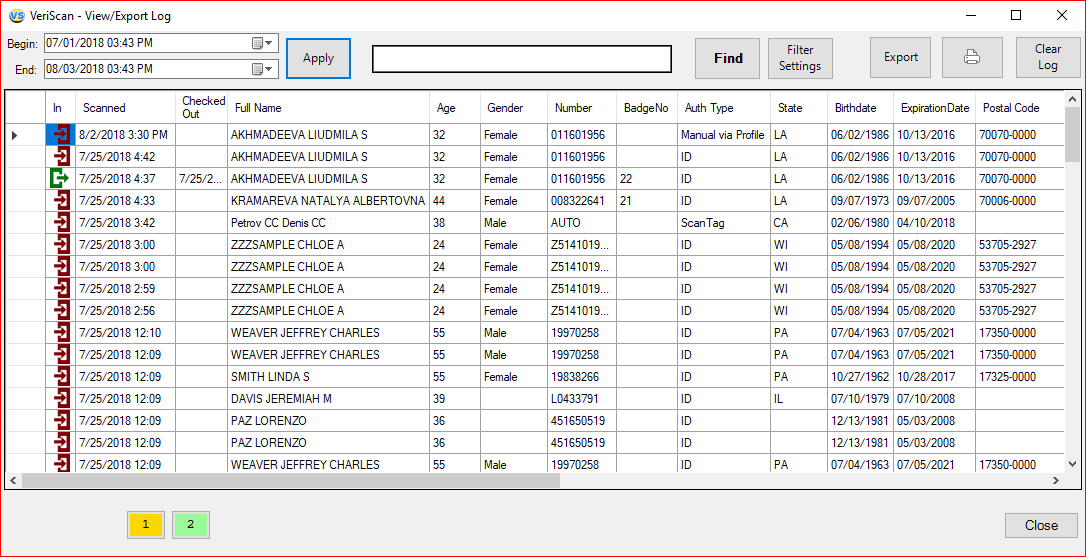
Please note that this option is NOT available by default.
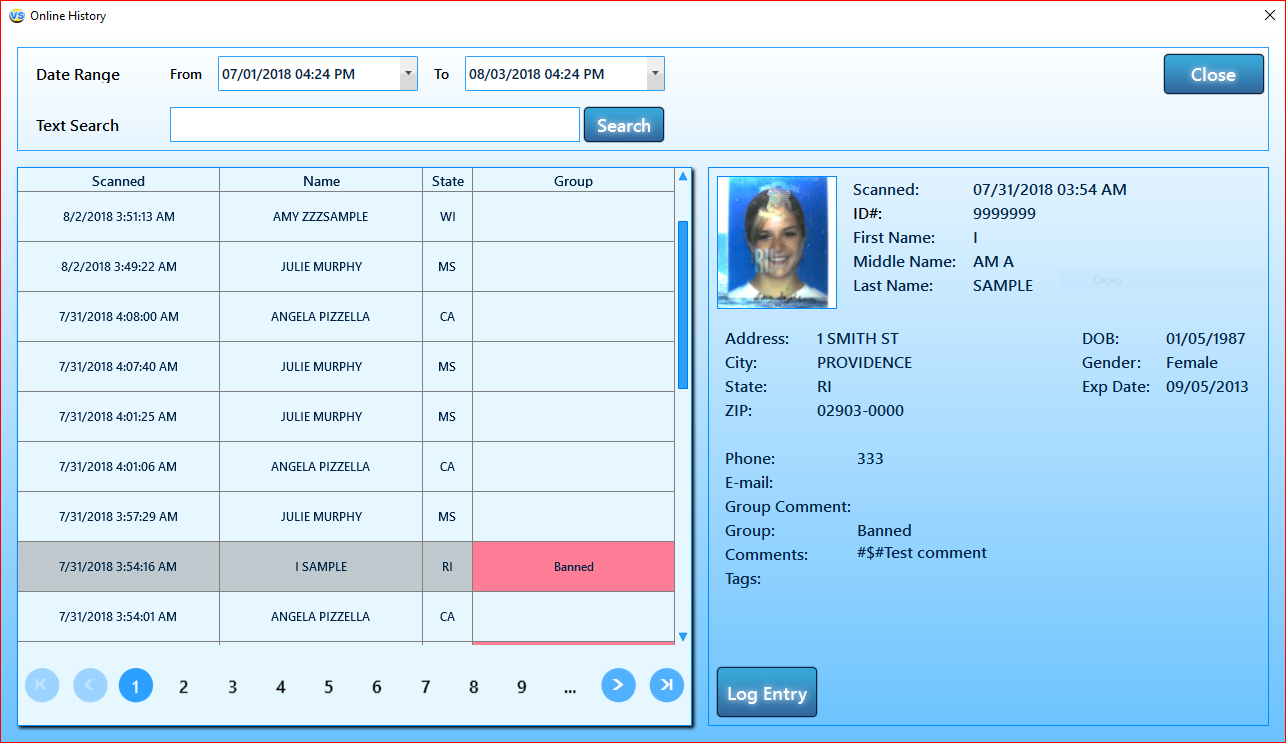
Online History
For VeriScan Online users, access to your scanned data couldn’t be made easier. With the Online History feature, you can view the scanned data from all your connected devices right from your VeriScan Desktop application.
Profile Manager

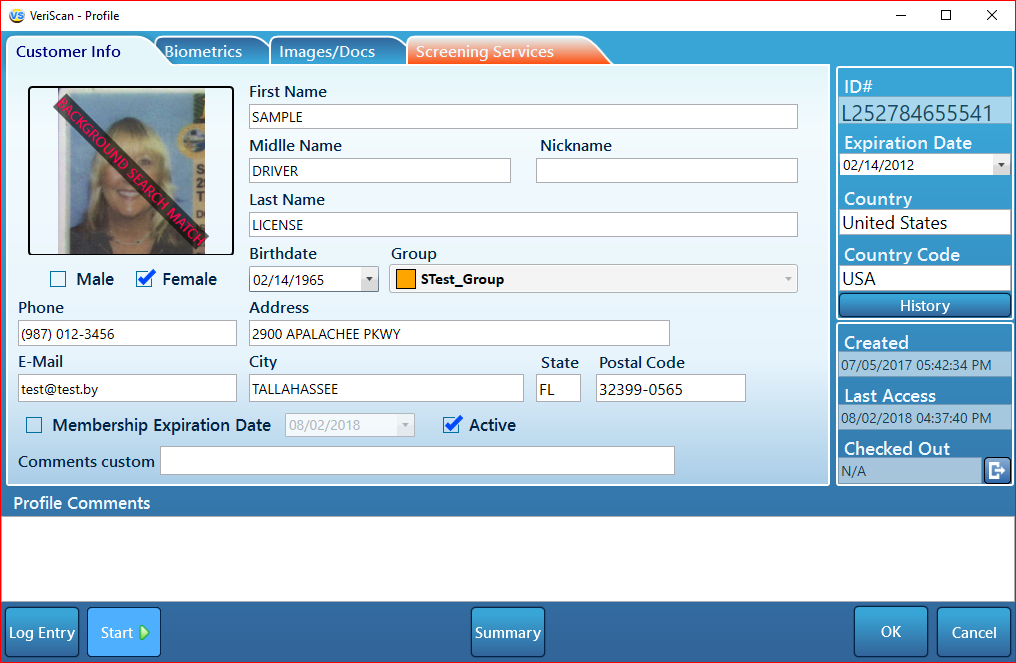
After an ID has been scanned, you will have the option to open a Profile Editor that details the card holder (by clicking on the General tab, then Profile Manager, then double click on the Customer name who you would like to edit).
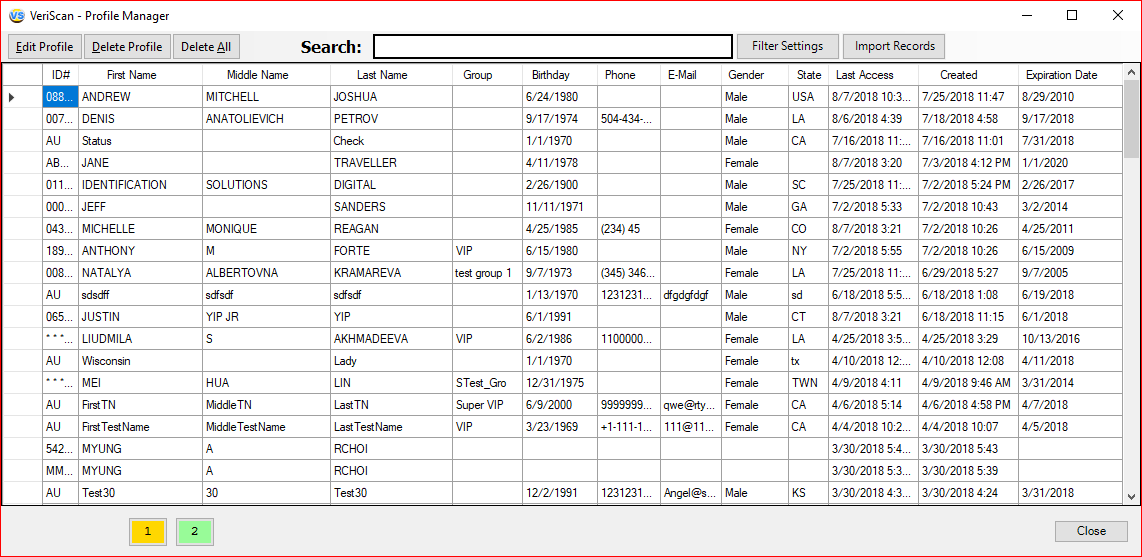
In this screen you can edit a customer’s record and Basic info using the Customer Info tab.
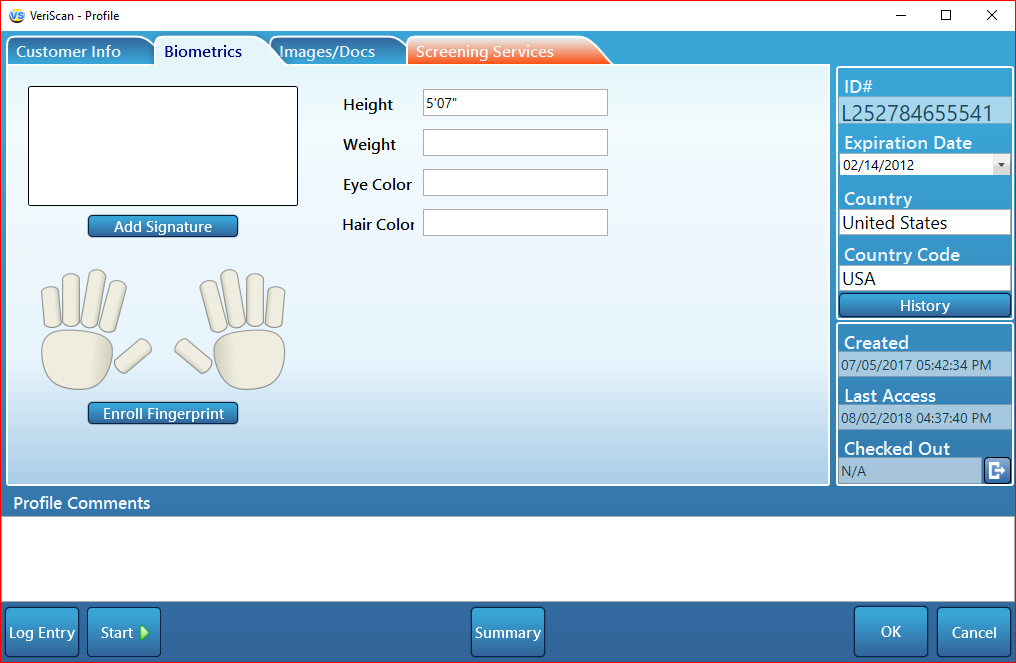
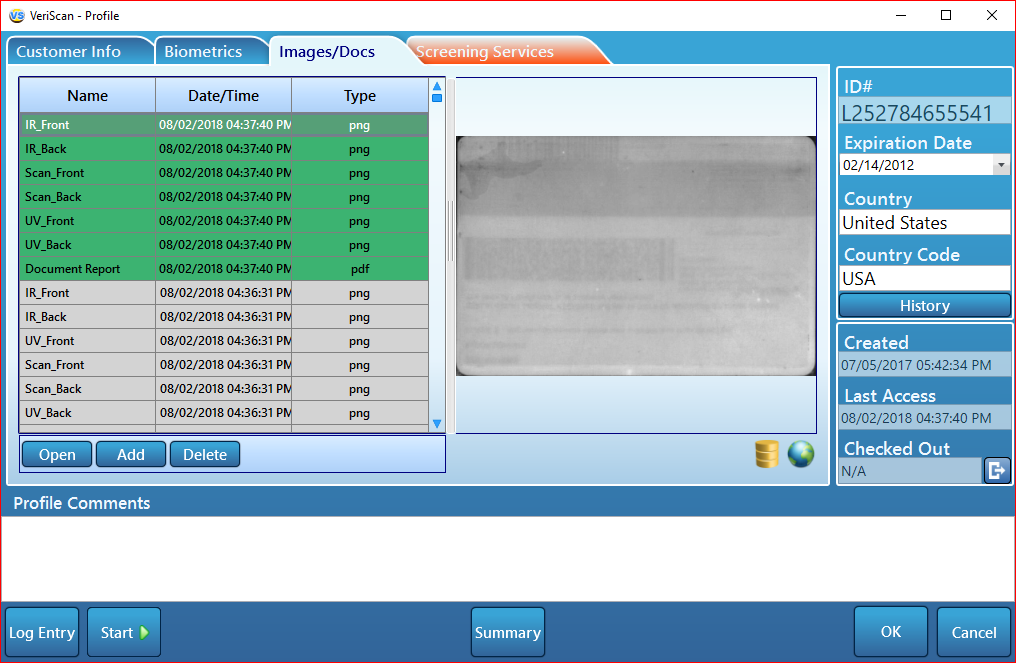
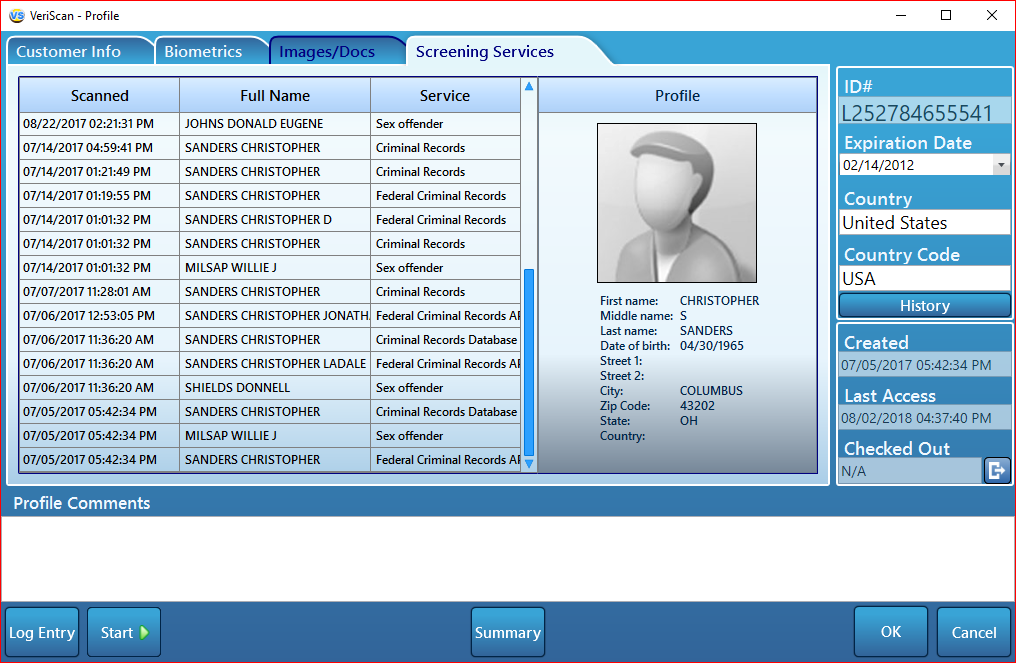
Profile Editor
In the Biometrics tab, the user may associate fingerprints and signatures with the ID, if the correct devices (such as the Topaz Fingerprint and Signature Pad) are in use.
In the Images/Docs tab, a flatbed scanner or attached USB camera can be used to link an ID with images. Relative documents may also be linked to the user profile for further reference.
If you are interested in the details of the "Screening Services" tab, see the section with the same name.
These tabs are explained at greater length later in following sections.
Load ID

"Load ID" is a manual scan that allows you to emulate DL-files. Work as a "Log Entry".
Screening Services

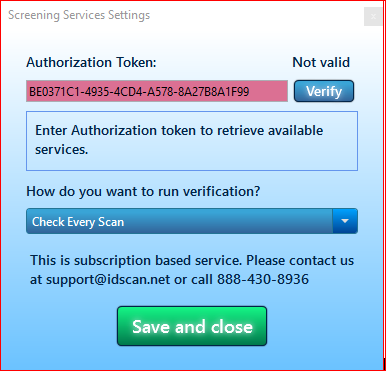
Basic settings of the "Screening Services" service, which is located in the "General" tab. For the service to function, authorization is necessary. To do this, enter "Authorization Token" and click the "Verify" button. If the registration data is correct, we will see the "Authorization Token" display on a green background and the "Valid" text above the "Verify" button. Here, you will be given the opportunity to choose the services in which the search for data on default offenders will occur.
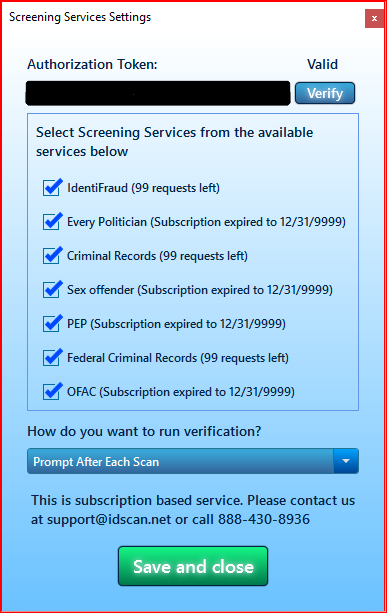
If the registration data is incorrect, we will see the line "Authorization of the token" in red and the inscription "Invalid" above the "Confirm" button.
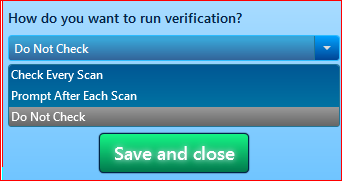
Below in the same window, you will be prompted to choose one of the three modes of the service.
- Do not check - do not automatically poll the service;
- Check each scan - perform an automatic service scan after each scan, taking into account the connected "Criminal Services" in the "Screening Services" by default;
- Promt After Each Scan - display the dialog after each scan, with the ability to select the parameters of interest or to refuse the service altogether.
When you finish selecting the desired settings, you must click the "Save and close" button in the bottom of the window to apply all selected settings.
This is how the dialog appears in the Promt mode after each scan.
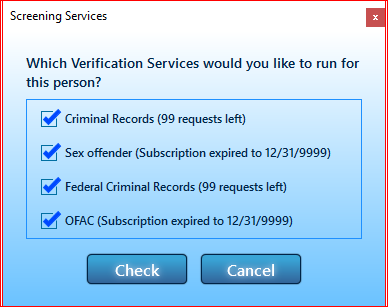
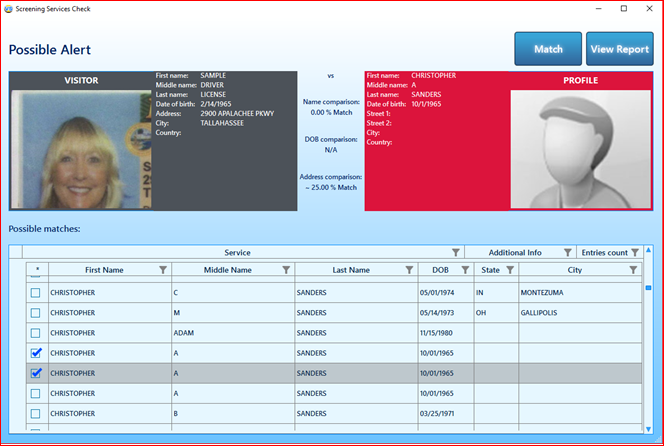
This opens a dialog box in the prompt mode after each scan. If the profile has been scanned for the first time, or there are no fixed violations in this database, we will see an offer to search for "Criminal Services" or refuse this procedure and make a regular visitor entrance (depending on from the selected default settings in "Screening Services"). The dialog box will look like this when the Check Every Scan setting is selected. You can either view the data found, or simply close the window by clicking on the cross in the upper right corner of the window.
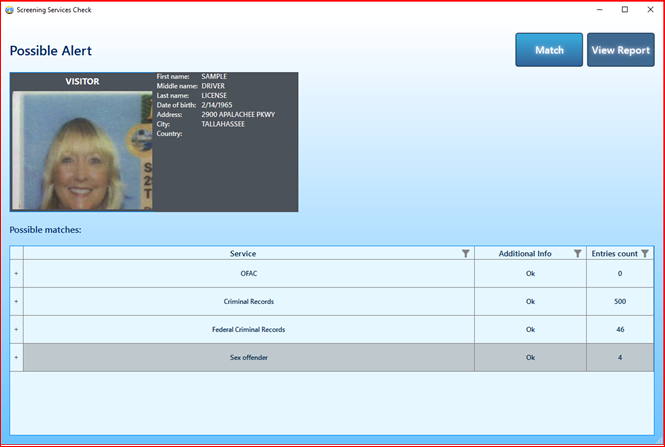
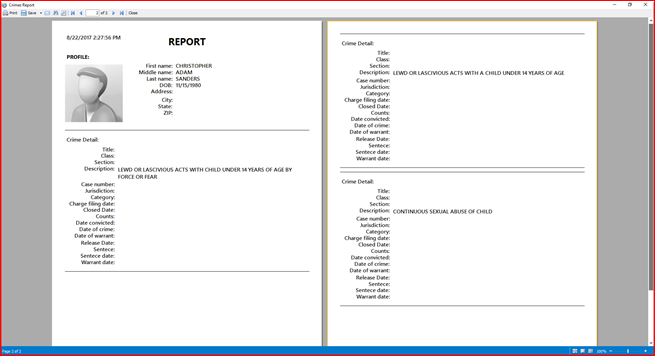
In order to compare data from the databases, you need to select the interesting entry and click "View Crimes Report" - the report will be opened in a separate window in pdf format.
At the end of the comparison of the records, check the boxes on the left of the required records in all the required sources and press the "Match" button. The service will end and save all selected records in the visitor's profile.
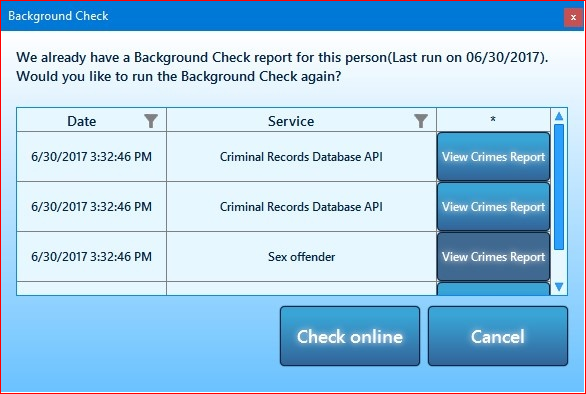
If the profile has already been scanned and has violations in our database, the "Background Check" dialog box will be displayed. The window will display information about the date of the last visit by this person and it is offered to view the attached records of violations, and it will also be offered to search for new, up-to-date information in the "Criminal Services" databases.
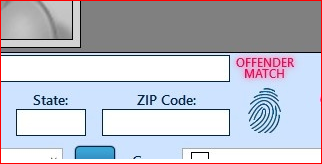
Also in the main window we will see the "OFFENDER MATCH" icon in red above the "Fingerprint" icon.
Viewing information on visitors is as follows. Select the interesting entry and open the visitor profile.
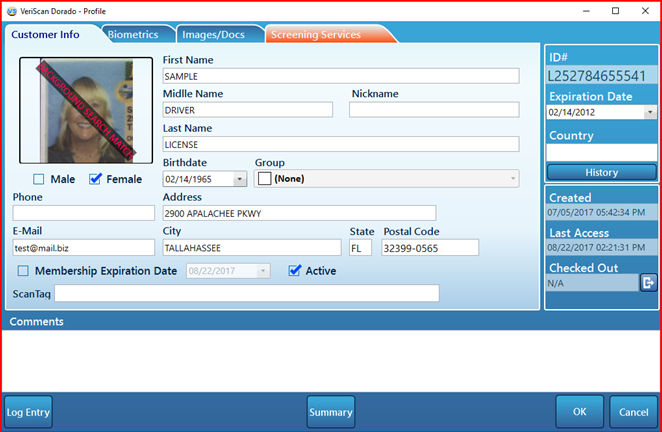
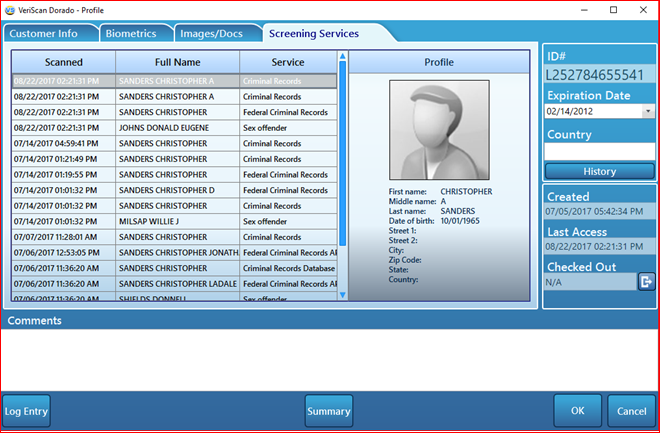
On top of the visitor's photo we will see the text on the diagonal "BACKGROUND SEARCH MATCH". Also we will see that the tab with the orange spine "Screening Services" was added. Switching to this tab, we will see the following information:
- dates of visits;
- the name of the visitor on which the comparison was made;
- services in which violations were found;
- a brief personal information on the visitor for each added entry.
All reports found in the "Criminal Services" databases can be viewed in the "Images / Docs" tab in the normal mode.
