The Reports tab contains of all types of templates: badges, reports and agreements

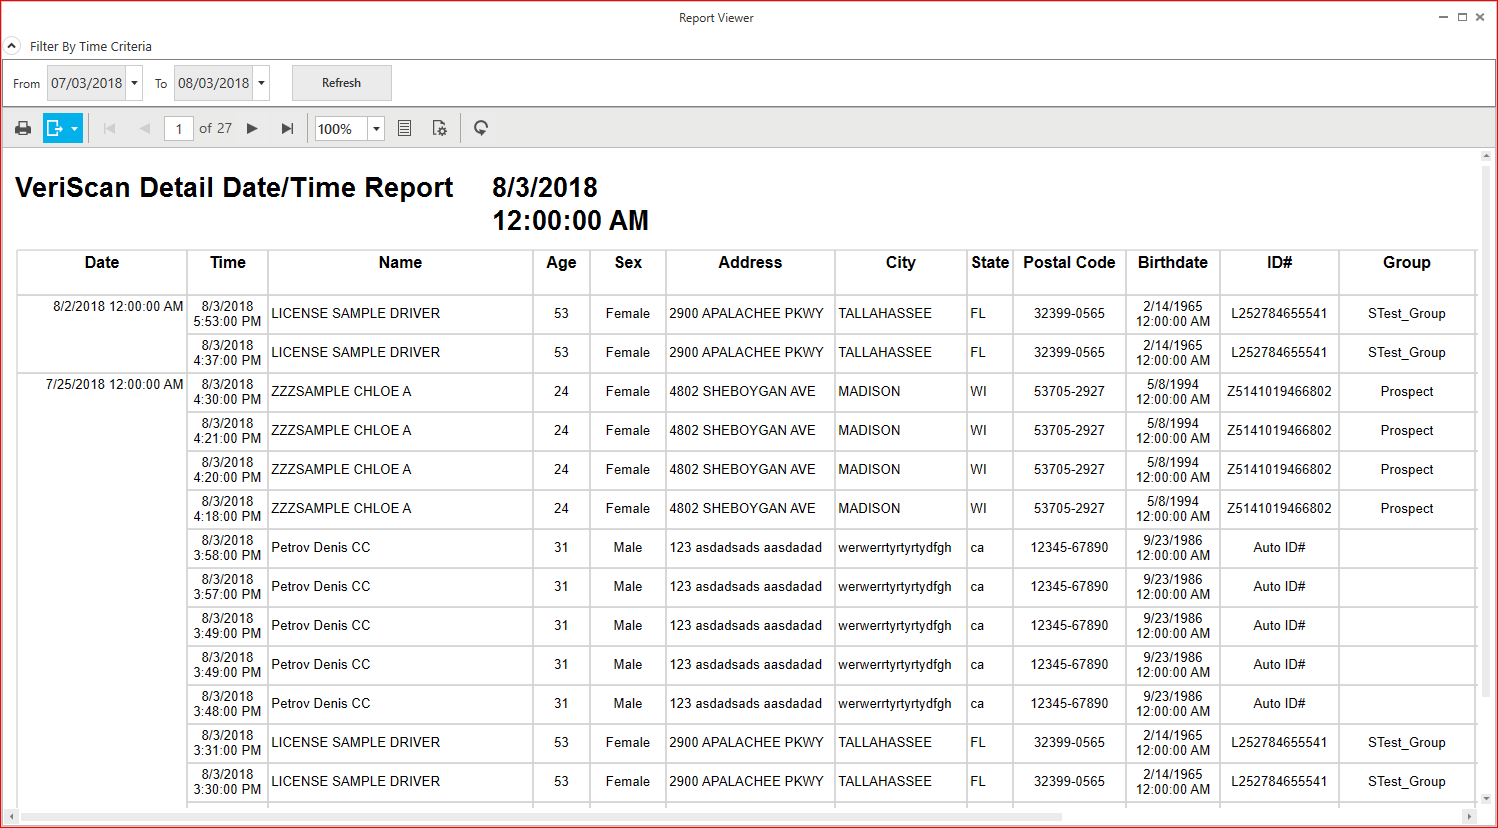
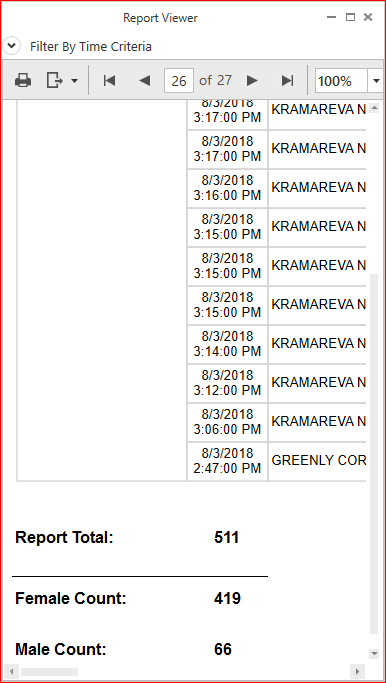
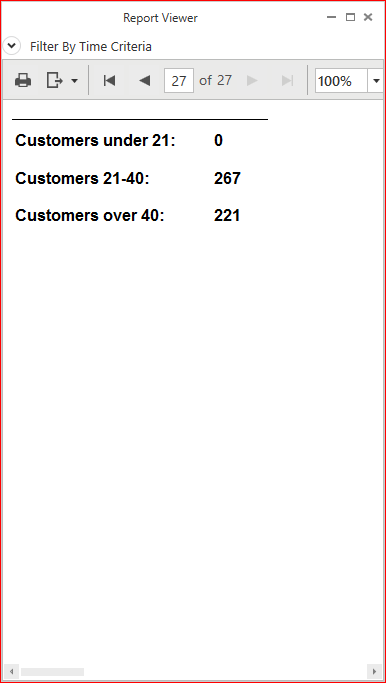
Date/Time Report

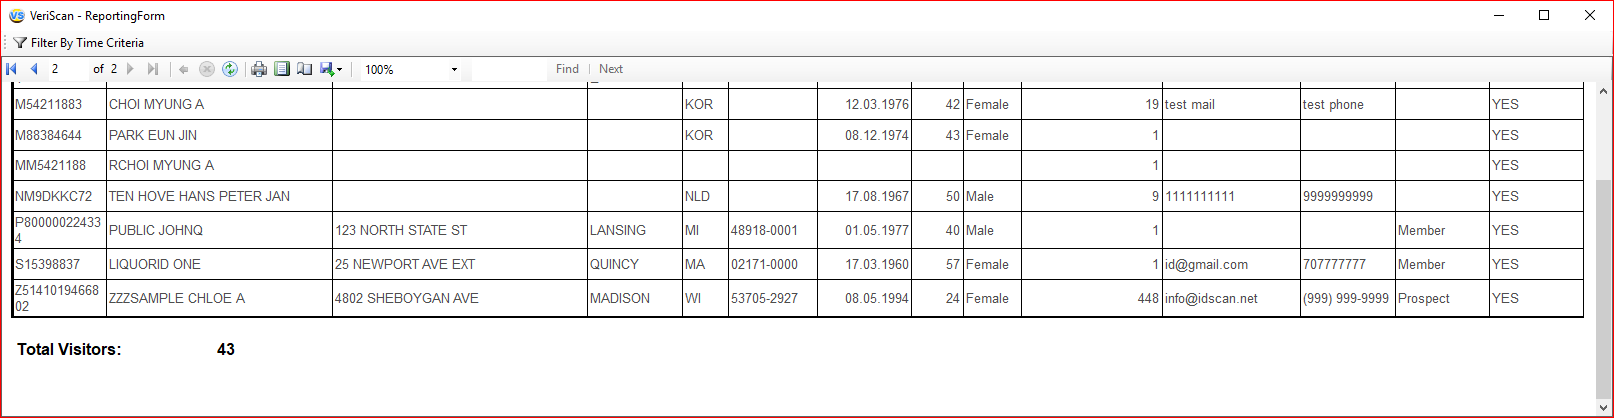
The Date/Time Report will display the most data out of all the reports. With your desired date and time range selected, this report will display all information about your customers.
In addition to exporting a data log (that has allavailable information, including time stamps of the scans)(located under General→View/ExportLog), VeriScan offers detailed Daily Reports via the Reports Menu→Date/Time Report. The report can be saved in Excel, Word or PDF format and offers a quick summary breakdown of customers in addition to providing details such as name, age, gender, address, scan time, date, male/female count, etc. (Make sure that under Setup→Log, Write to Log is checked in order for the scans to be saved and utilized when creating reports).
 ,
, 
Unique Visitors List

The Unique Visitors List will show you which of your visitors are unique and not repeat customers.

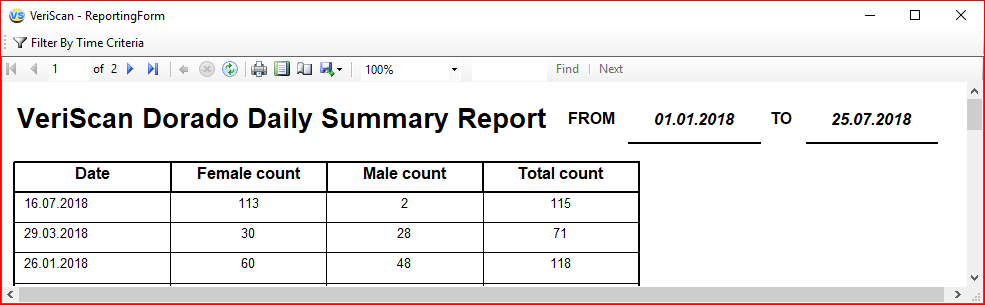
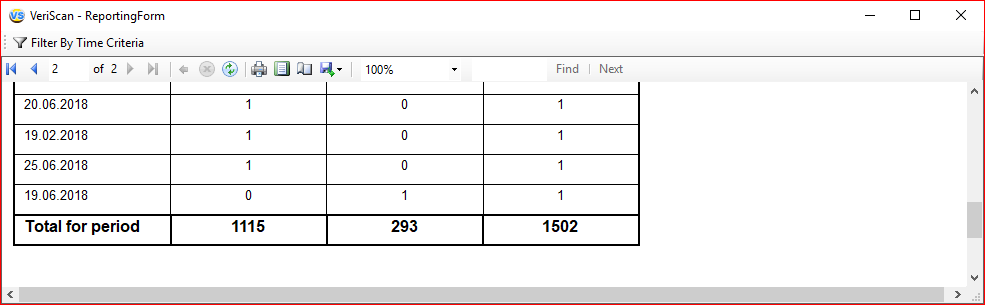
Daily Summary Report

The Daily Summary Report gives you a count of male and female visitors.
Emergency Roster

If you’re tracking In and Out, the Emergency Roster is a good way, in the event of an emergency, to see a list of everyone that should be on the premises.

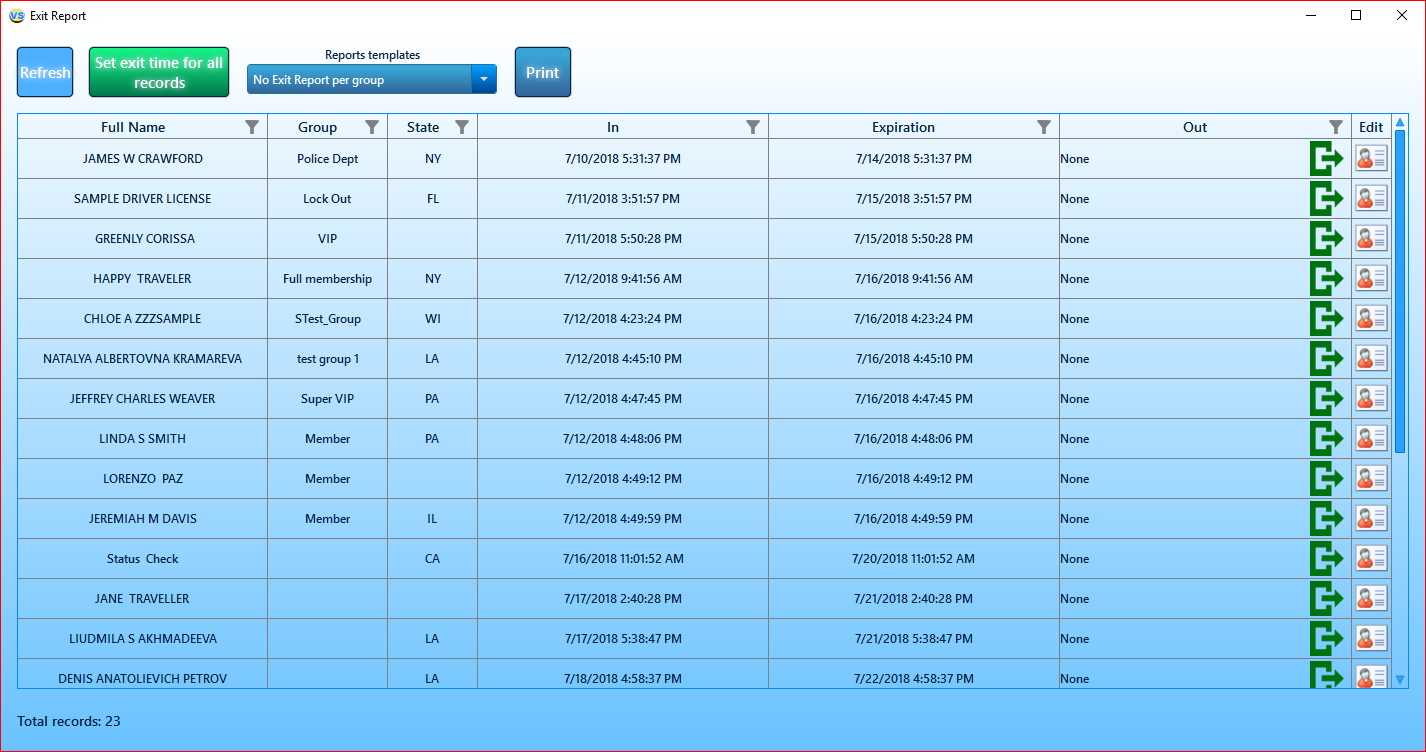
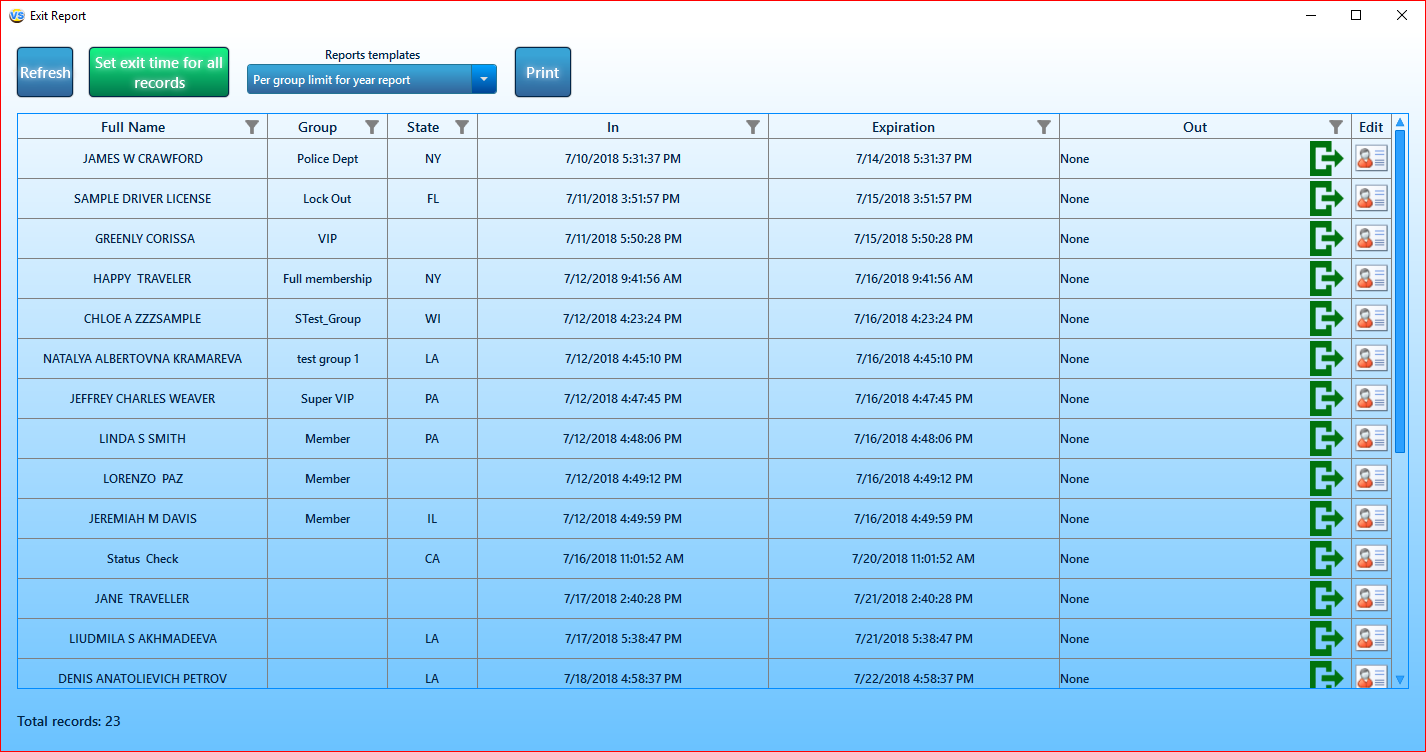
Exit Report

It contains a four reports:
- No Exit Report per group
- Per State Report
- Per year visits limit report
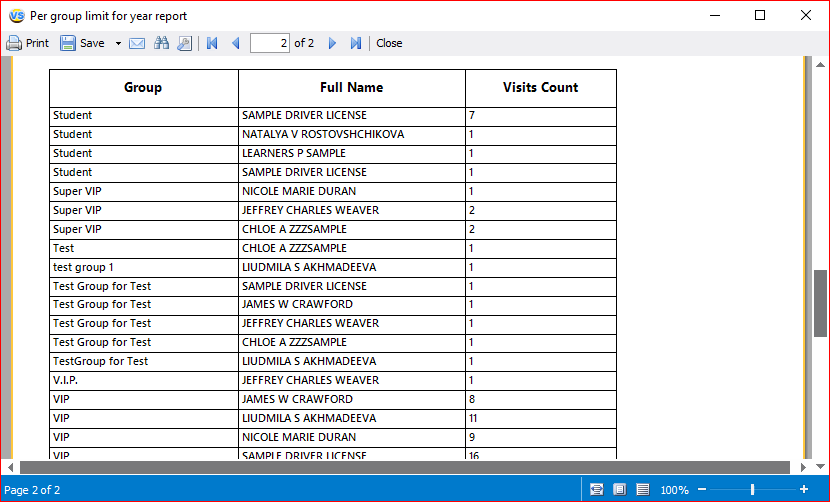
- Per group limit for year report
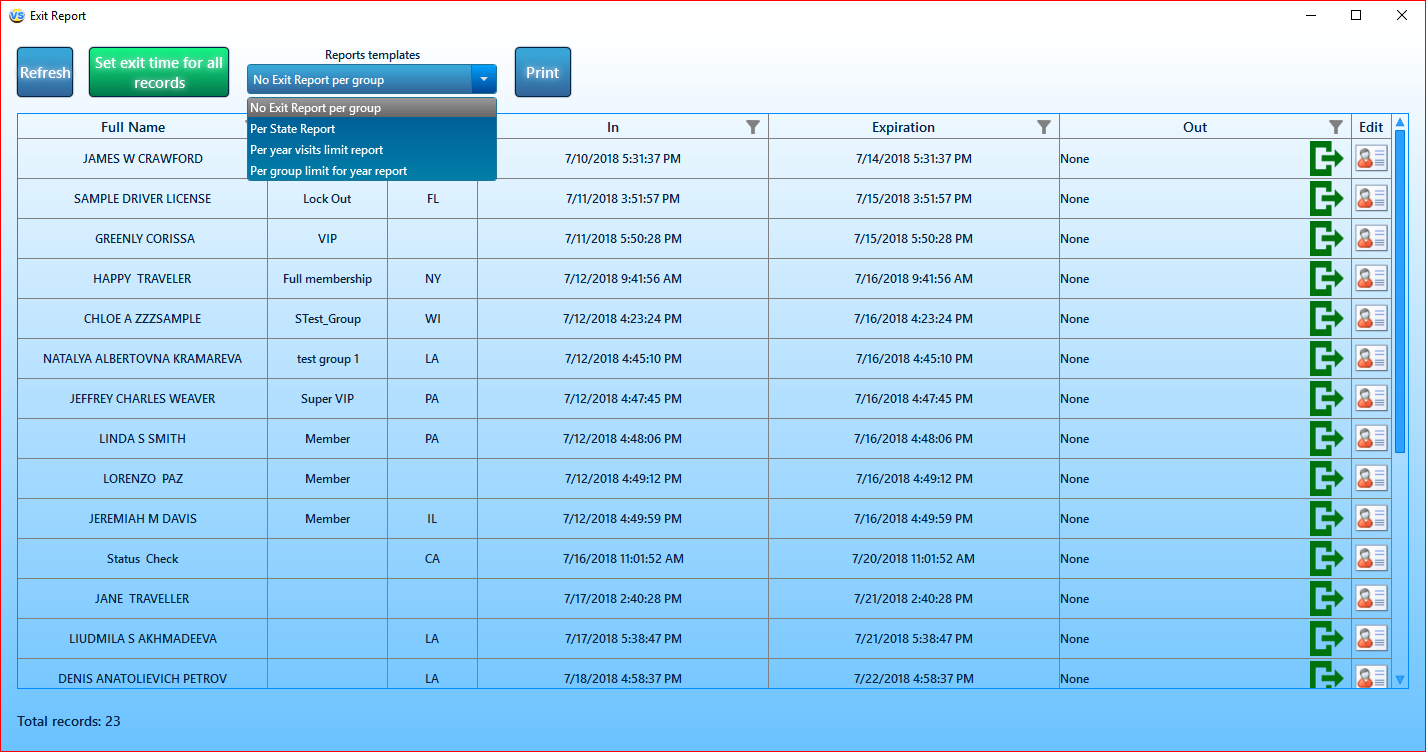
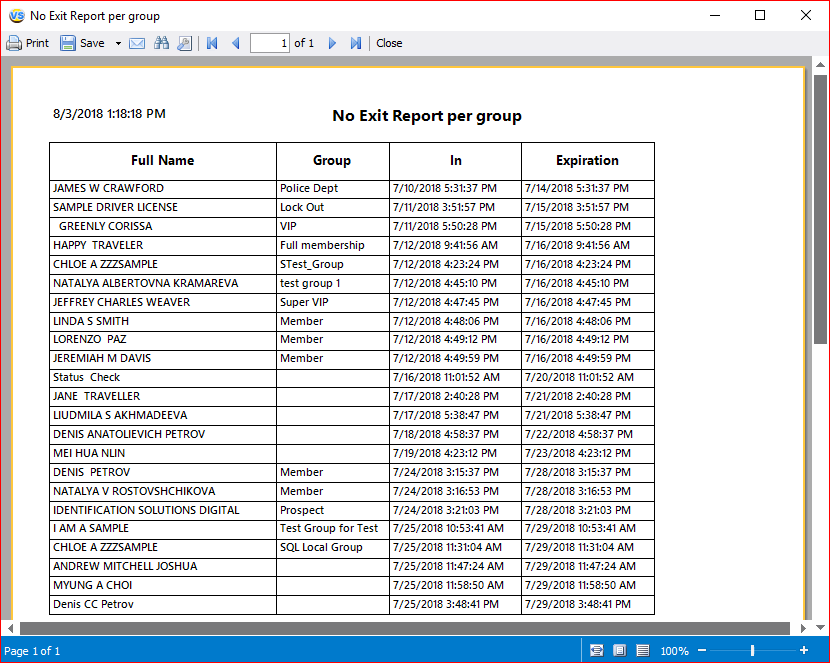
The "No Exit Report per group" contains info about all visitors whos did not out from object.
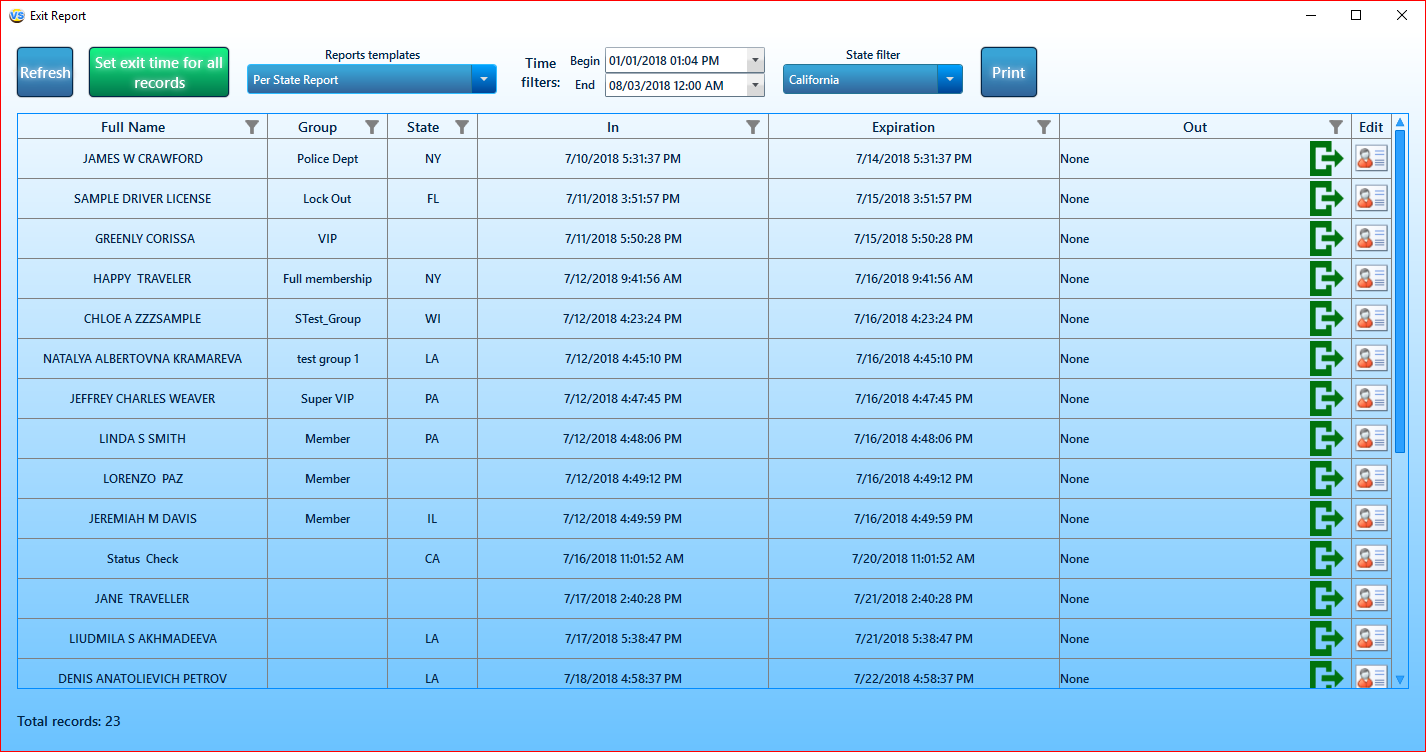
The "Per State Report" allows you to sort by US states or Canada states.

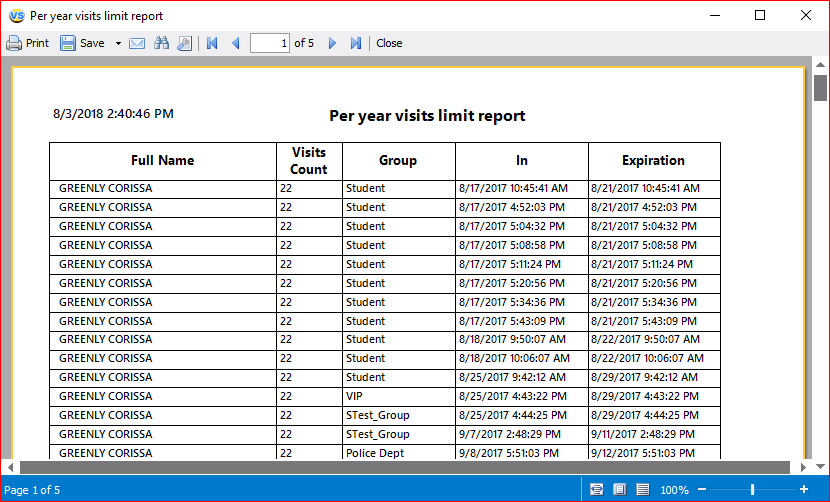
The "Per year visits limit report" contain quantity of visits, names of groups and dates of visits for all visitors.

The "Per group limit for year report": in this report, the first sort by group, then by name.
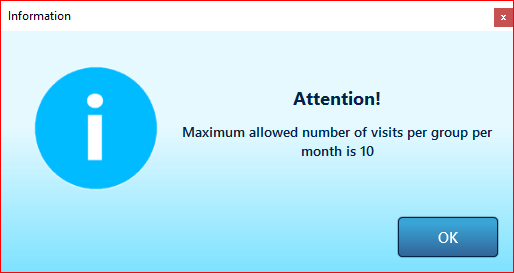
Settings for Exit Report
This message appears when you try to make more visits in a certain group than allowed.
This message appears when you try to make more visits a year than allowed.
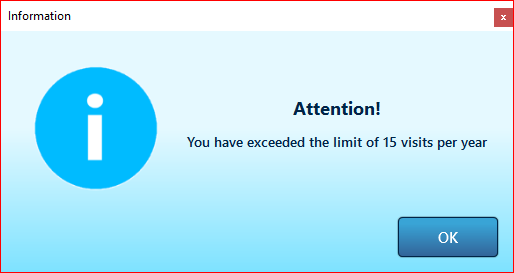
We have a CustomVisitsSettings.txt file in which placed the settings those messages. It is in C:\ProgramData\Nautilus\VeriScan It contain just three settings.

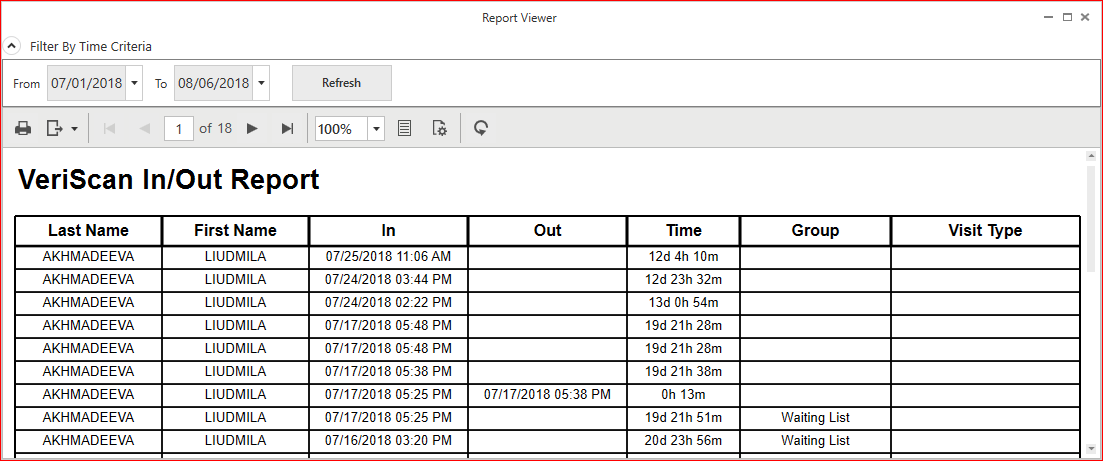
In/Out Report

The In/Out Report gives you a summary of all In and Outs within a selected period of time.
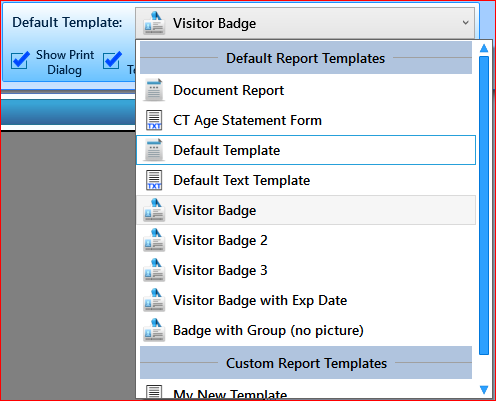
Default Template
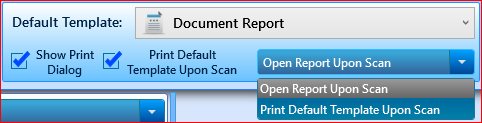
In the "Default Template" (combo-box) is for the selecting a template for default printing.
The "Show Print Dialog" mode is responsible for displaying the window with the print settings after each scan.
For the working with templates select the "Print Default Template Upon Scan" mode.
If you select the "Open Report Upon Scan" mode after scan you will be see the template with customer's data. And the print of template will be manually only.
For auto printing select the "Print Default Template Upon Scan" mode.
Customize Templates

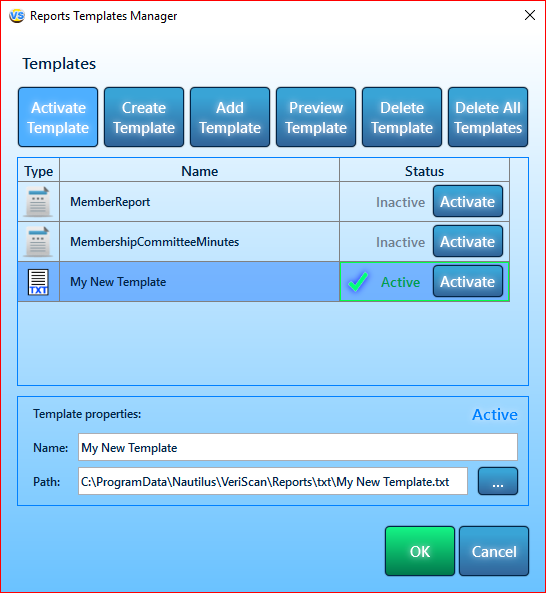
Within the Reports Templates Manager, you can activate, create, add, and preview templates.
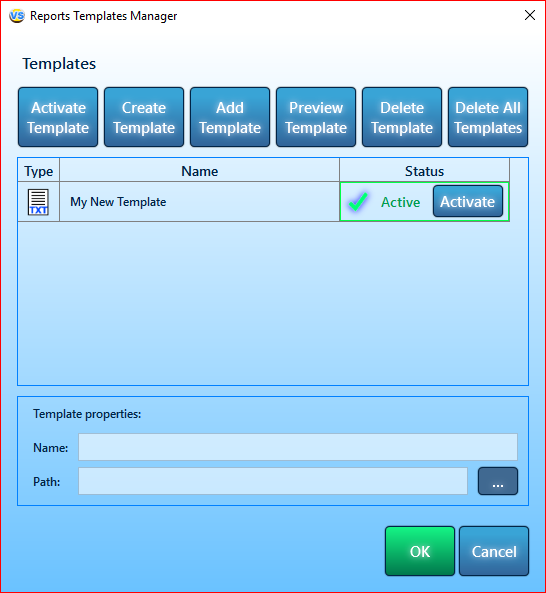
Once your template is added, select Activate in the list below to make it active. The report will be available to preview and print either following a scan or at any time between scans.
For selecting yours template as default for print you must select your template and click on "Activate" button or on "Activate Template" button:
For creating template click on the "Create Template" button and enter the name of your template, click OK:

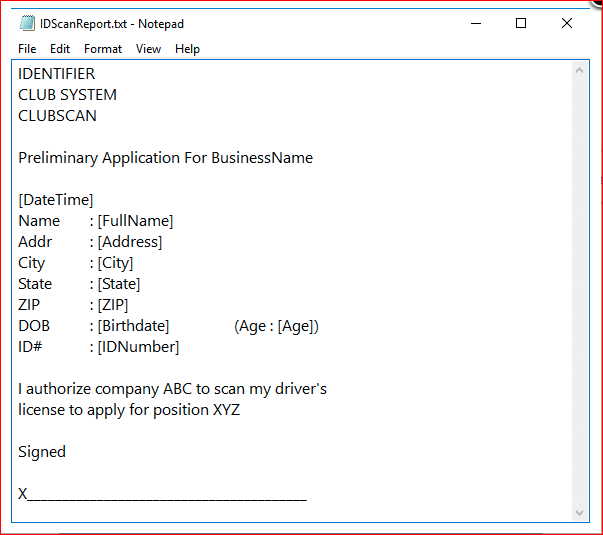
VeriScan allows you to design custom reports depending on your needs. The following fields can be filled out:
- [DateTime]
- [FullName]
- [FirstName]
- [LastName]
- [Address]
- [City]
- [State]
- [ZIP]
- [Birthdate]
- [Age]
- [IDNumber]
Each VeriScan has a preinstalled Default Report Template located in C:\ProgramData\Nautilus\VeriScan\Reports .
Feel free to customize this default report using Notepad or any other text editor.
The custom report will be printed to a default printer automatically upon selecting the option Print Default Template Upon Scan.
To delete any template, select it in the list and click the "Delete template" button.

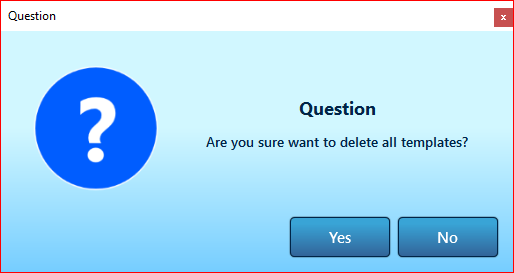
To delete all templates, just click the "Delete All Templates" button.
If you need a template of a certain kind, please contact us: https://idscan.net
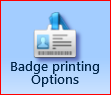
Badge Printing Options
Selecting the visitor badge option under template reports enables the printing of said badge with every ID Scan. This is especially useful in institutions such as schools or secure locations such as vaults or other internal facilities.
Badge Printing Options → Select logo, you can designate your brand image (1:2.5 height to width ratio recommended; JPG, BMP, PNG supported) as the image at the top of the badge.

If you incorrectly rotate the logo, you will see a message:

Attention: if you are click on "Save changes" button with this active message, then the logo will be auto rotated in horizontal position after save.
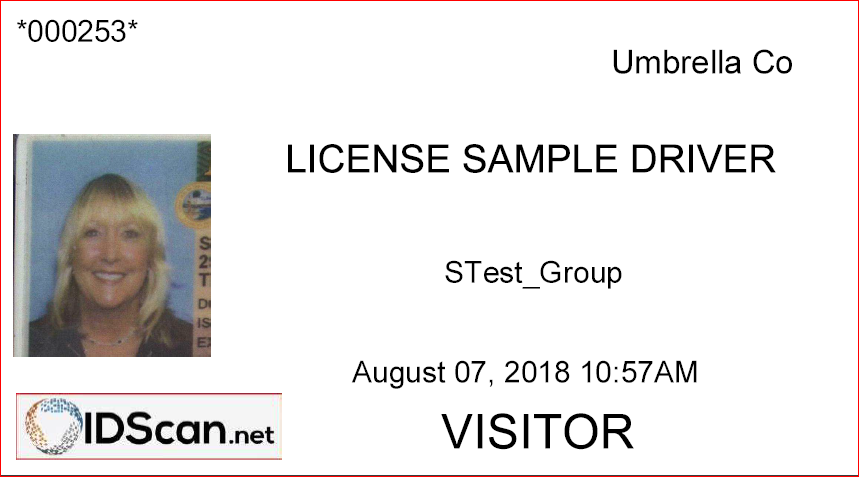
Below is a copy of the default visitor badge with an example logo:
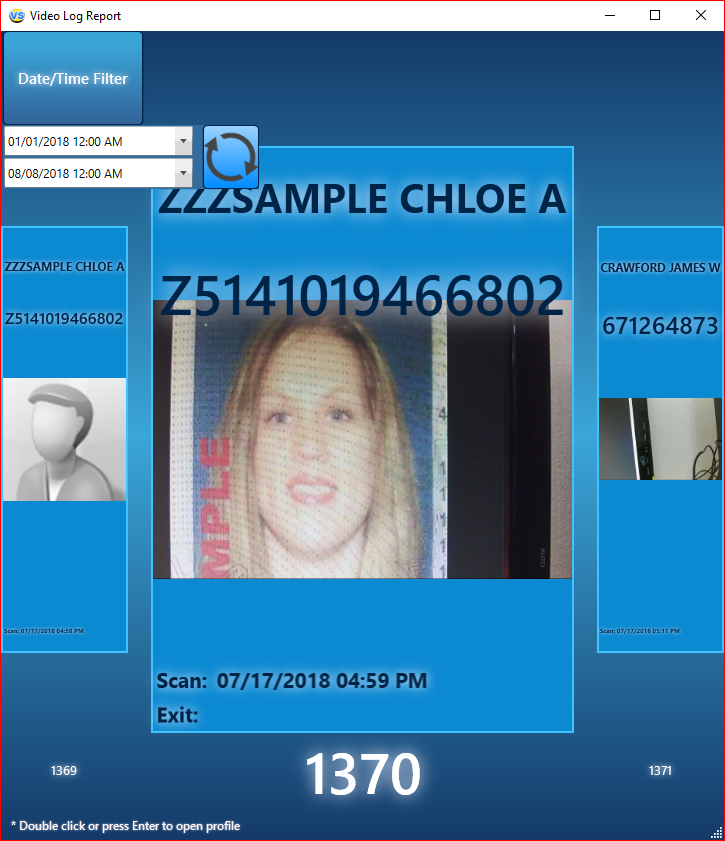
Video Log Report

The "Video Log Report" allows you to set the time range and quickly view the list of customers.
The list is formed in chronological order with the date and time taken into account. Also information about when the visitor came and left is displayed.
If you double-click on the image or press "Enter", the profile opens in the "Profile Editor".